
Description
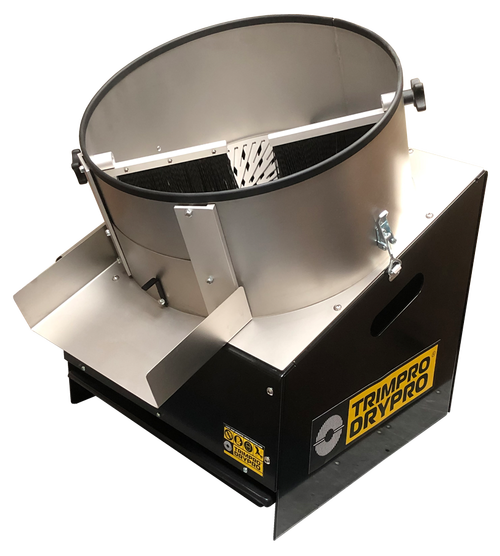
The TRIMPRO DRYPRO was developed at the request of producers looking for yet another gentle, efficient, and high quality TRIMPRO product designed for those drying their flowers before trimming. With its adjustable-speed motor, leaves are trimmed by stainless steel grates movement on each other. Its trimming capacity up to 12 lbs/h makes it one with the best return on the market. Its angled construction and latched front gate makes retrieval extremely simple, allowing perfectly trimmed flowers to exit the upper cylinder while the machine is still running.
Materials
- Grates & cylinder : Stainless steel (slot size 1/4″)
- Body: Powder coated aluminium
- Arms: Polyethylene FDA approved
- Brushes: Nylon FDA approved
- Tray: Polyethylene FDA approved HMWPE
- Forward & Reverse switch
- Timer
Technical
- Speed: 30 rpm
- Amps: 0.5 Amps
- Voltage: 110 Volt
- Wattage: 25 Watts
- Capacity: 12 lbs/hr. or 5.5 Kg/hr.
- Weight: 48 lbs. (21.8 Kg)
- Dimensions: 18" x 18" x 24" (LxWxH)
User Instructions
- Carefully read the security instructions (General Warnings) before using the machine
- Plug the machine into an electrical outlet
- Turn on the machine using the Forward (FWD) (A) switch
- Fill the upper container (B) with dried plants (between 8-12% humidity) without branches
- Adjust the motor dimmer (C) at MAX and adjust accordingly
- Set the timer (D) to desired time according to volume and strain of the plants
- Let the plants move around in the machine according to desired time or until the desired cut is obtained
- Adjust the brushes (K) angle accordingly with side screw handles (L)
- Open the exit door (E) and turn the switch to Reverse (REV) until upper contaienr is empty
- Remove frequently the accumulation of trim in the bottom tray (F) so it does not obstruct the motors ventilation
- Turn off the machine using then STOP swtich (A) and by turning off the timer (D)
- Unplug the machine from the electrical outlet
Cleaning Instructions
In order to facilitate the trimming, clean both grates frequently with isopropyl alcohol. This must be done when the machine is not running
- Turn the machine switch to STOP (A)
- Remove the hood fastener (G) from the upper container
- Remove the upper container (B)
- Untighten the center screw (H) to remove the central hub (I) and the top grade (J) from the motor shaft
- Remove the top grate (J) with both hands so it does not bend
General Warnings
- Never place your fingers, gloves or any other body part in contact with the grate or the blade.
- Never apply pressure on the grate.
- Do not use scissors, knives or any instrument above the grate.
- Safety glasses and gloves are required at all time.
- The gloves have to be tight enough so they don’t get inside the grate slots. A loose glove is dangerous. BE AWARE!