The 4 Best Electric Dryers in 2023
One of the main issues that novice growers face is choosing the right harvesting and drying equipment.
Given that this device is a big factor in determining the quality and quantity of your buds, it’s not one of the bad options you can afford. Otherwise, your profit margins and sales rates may suffer.
No grower wants to have that painful experience because you’ve worked so hard to grow buds that consumers want to avoid.
Properly drying and curing Medicinal Plants helps preserve its flavor, aroma, and overall potency, and prevents mold and other issues that can damage your crop.
In this article, we’ll provide tips on key factors to help you choose the right drying equipment.
What is the purpose of drying Medicinal Plants?
When growing Medicinal Plants, you need to let the buds dry after harvesting so they are ready for consumption. This process is called “curing” and is very important as it can have a major impact on the taste and potency of the buds. If you smoke the buds when they are too wet, they are more likely to mold and lose potency, so it is important to dry them completely after harvesting them. When a plant is ready to be harvested, there are three main stages in the growth process — the growth phase, the flowering phase and the drying phase. During the drying stage, the buds are ready to be harvested and completely dried, ready for consumption. Drying Medicinal Plants is essential to ensure the buds stay fresher for longer and make them easier to store. In addition to keeping your buds fresh, drying Medicinal Plants is a great way to increase their potency.
ECO Farm Electric Medicinal Plants Dryer
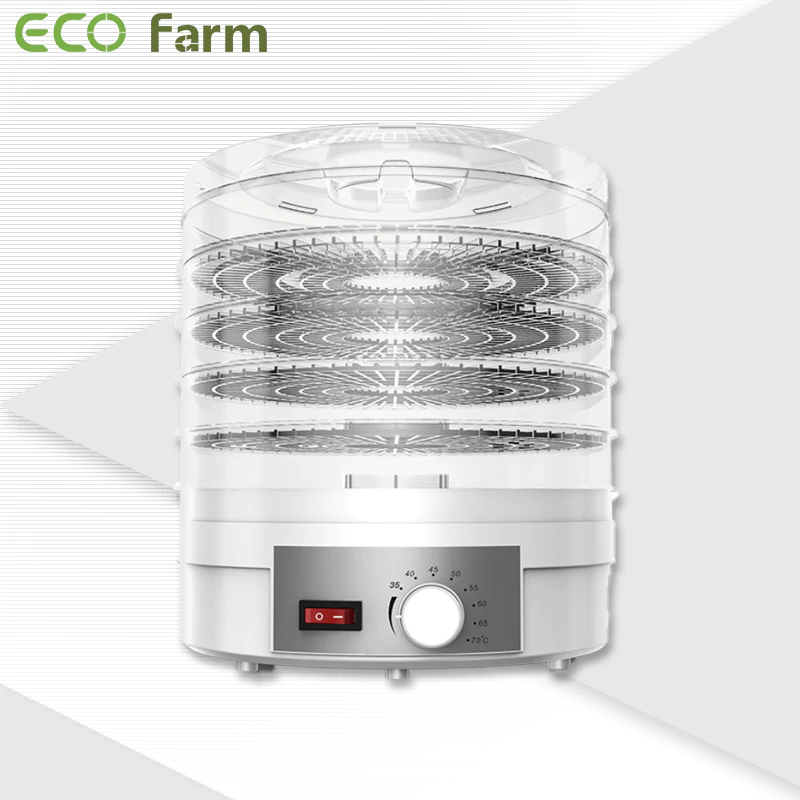
Features:
ECO Farm dryers give you the perfect environment to dry your medicinal plants every time. ECO Farm uses advanced technology to provide you with the ideal temperature, which has been specially tested for drying medicinal plants. Multi-directional airflow along with an open woven tray ensures that every bud is consistently dry. It also means you don’t need to spin or touch the buds during the drying process. ECO Farm delivers all of this in a captured environment, which means you get high-quality, consistent drying in small, enclosed spaces. Take back all the space you need for hanging drying because ECO Farm gives you consistent drying in just one square foot at a time.
ECO Farm Medicinal plants Dryer
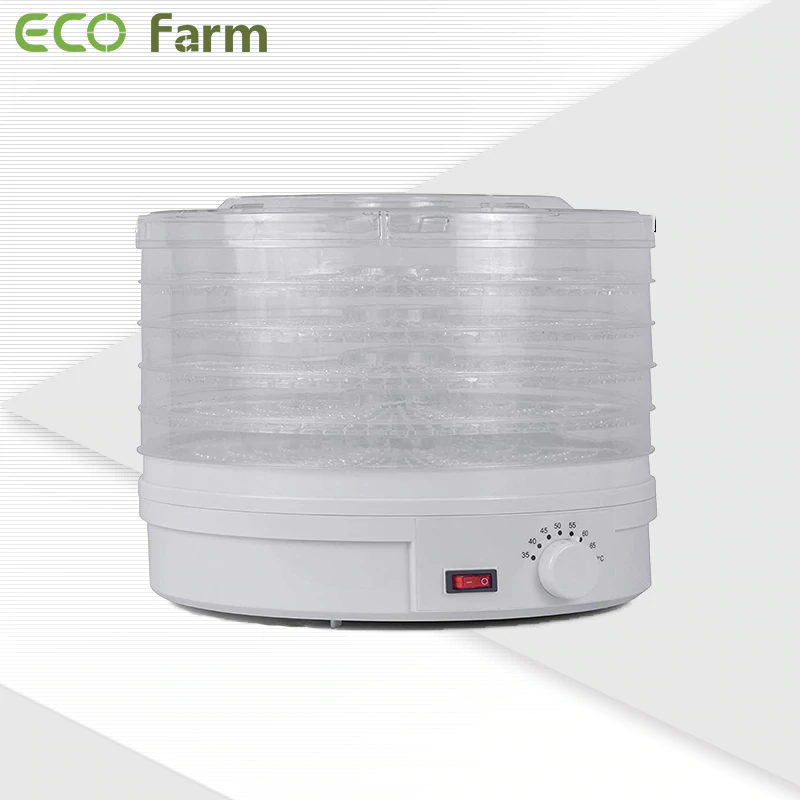
Features:
The ECO Farm plants dryer facilitates a much faster and more efficient drying of your plants. Simply the dryer will distribute the air evenly, thus preventing moisture from spoiling the quality of the flowers that are in the drying period. This model has a low, pre-set temperature that is set to perfectly dry your medicinal plants every time.. If you do not have much space and you are worried where you are going to place it, do not suffer any more! since it is perfect for small places or when you do not have a discreet place to carry out this important step of cultivation.
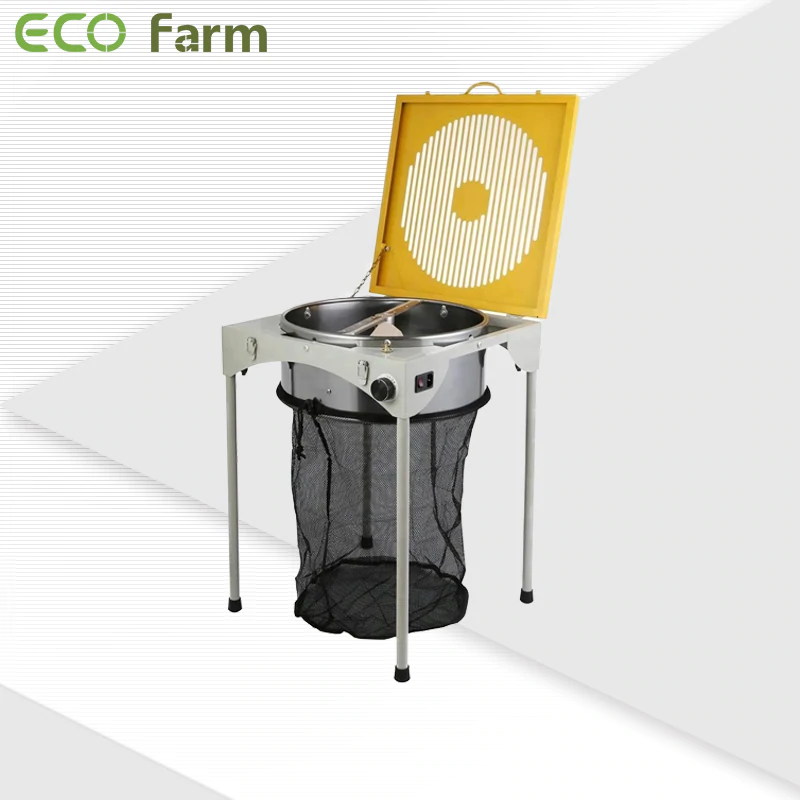
ECO Farm 5 Trays Herb Drying Machine
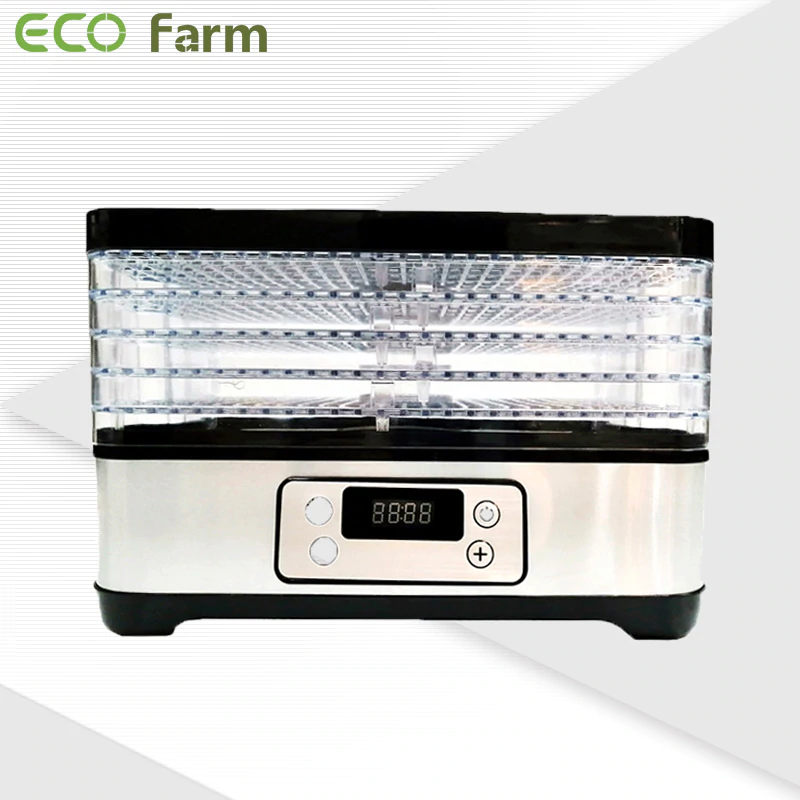
Features:
The unit has an automatic fan that circulates warm air evenly inside, and 5 stackable trays with grid-like bases. Transparent tray allows visualization of dehydration status. These trays are double height adjustable so that the entire flower will fit when using the maximum height between trays.
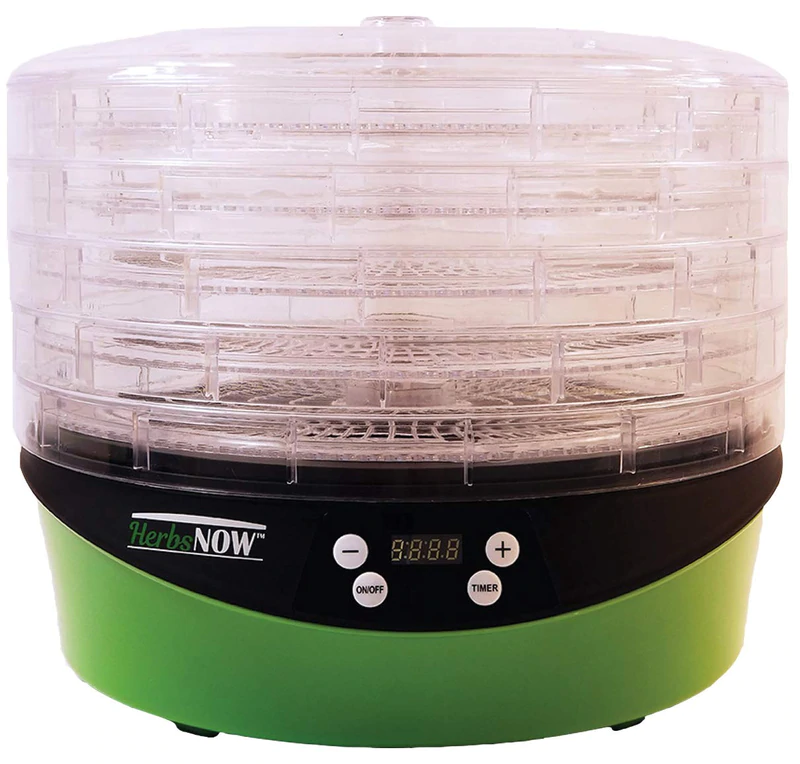
Features:
The HerbsNOW Herbal Dryer with USB uses a low preset temperature specifically for drying herbs while retaining their aromatic and medicinal and/or culinary qualities. The USB plug can be used with a variety of accessories, such as an air filter to keep strong fragrances in, a desktop humidifier for dry climates, or a small keyboard-style vacuum to help clean up. The dryer includes five removable bottom trays to efficiently dry small and large blooms without worrying about crushing their delicate nature. Neat trays sit neatly at the bottom of the dryer to maximize hay production and help make cleanup quick and easy.
Factors to Consider When Treating Medicinal Plants
As you prepare to cure Medicinal Plants, there are several important factors to keep in mind. These factors can be the deciding factor in the success or failure of curing, so pay close attention to them throughout the curing process.
Keep an eye on humidity levels — the first thing to remember is that you cannot start the curing process until the buds have dried to the correct level. If there is still too much moisture inside the Medicinal Plants, mold can grow and ruin everything. If you smell any ammonia when you open the curing pots, take them out immediately and put them back in the drying room. You also don’t want buds that dry out too quickly, as this can create a horrible smoking experience. The correct humidity level for drying is 45% to 55%, and slightly higher for curing, around 60% to 65%.
Keep cool, but not too cool — the perfect curing temperature is around 21C or 70F. Higher temperatures lead to faster breakdown of terpenes and cannabinoids, resulting in less potency and flavor.
Heal your Medicinal Plants in the dark — sunlight (or artificial light) is what we try to get the most out of in our cultivation, allowing the plants to produce those gorgeous, glistening trichomes with all the terpenes we love and the advantages of cannabinoids .
However, once you’ve harvested your crop, you need to keep it as dark as possible. Light causes cannabinoids and terpenes to deteriorate, which is the exact opposite of what we are trying to achieve with curing.
Conclusion
Drying Medicinal Plants is an essential step in the growing process as it helps preserve buds and improves taste. With the right technique and a little patience, you can dry your Medicinal Plants perfectly and ensure it lasts longer and tastes better. Through the drying and curing process, the natural terpenes and cannabinoids of the plant are preserved and the flavor and aroma of the buds are improved.
2023 Best Humidifiers for Plants & Homes
It can be unbelievable to bring home a beautiful plant for your space, put it by the window, water it, only to watch it wither and die for the next few weeks while trying to fix the problem. frustrated. What went wrong? Along with proper lighting and watering, humidity is an overlooked factor depending on the plant, but it can make a big difference. Many houseplants come from the tropics, where they are used to being in foggy conditions, and the dry air in our homes — especially in winter — can cause plants to stress and even die, so a good humidifier is a must Little for any plant lover.
But humidifiers designed to help us breathe easier at night aren’t always the best fit for our leafy friends. Here are some things to consider before adding one of these to your indoor jungle.
How to control the temperature and humidity of the grow tent?
Plants in a grow tent require different humidity levels at different life cycle stages. For example, the required humidity at the seedling stage is 70–75%, while at the flowering stage it is 40–50%.
Since increasing temperature affects humidity levels, you need effective control of both parameters.
Temperature control requires proper insulation and ventilation of the grow tent. You need to use — Cooling fans, air conditioners and heat pumps to maintain the temperature inside the tent
Grow tent humidifiers and dehumidifiers are used to control humidity levels. If the air inside the grow tent is too dry, you can use a humidifier to increase the humidity. But if there is too much moisture in it, you need to use a dehumidifier to extract the moisture.
ECO Farm Industrial Ultrasonic Humidifier for Greenhouse Planting
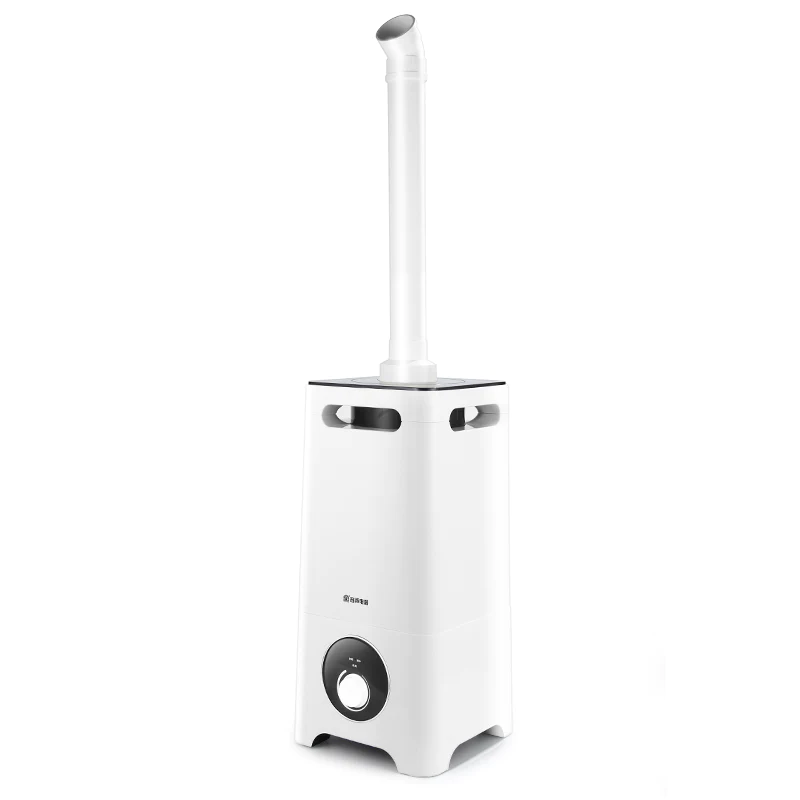
Features:
Since the running time of the ECO Farm humidifier depends on the tank capacity, it should be large enough to reduce the frequency of water refilling. With this humidifier you get a 12 liter water tank that will keep the unit running longer. While run times are a little lower than claimed, you’ll only need to refill the tank after two days. Since this is an ultrasonic humidifier, it runs very quietly. The noise level will be below 30 decibels to be exact, so it is very convenient. It also has zero light pollution to help your plants have optimal growing conditions.
Pure Enrichment MistAire Ultrasonic Cool Mist Humidifier
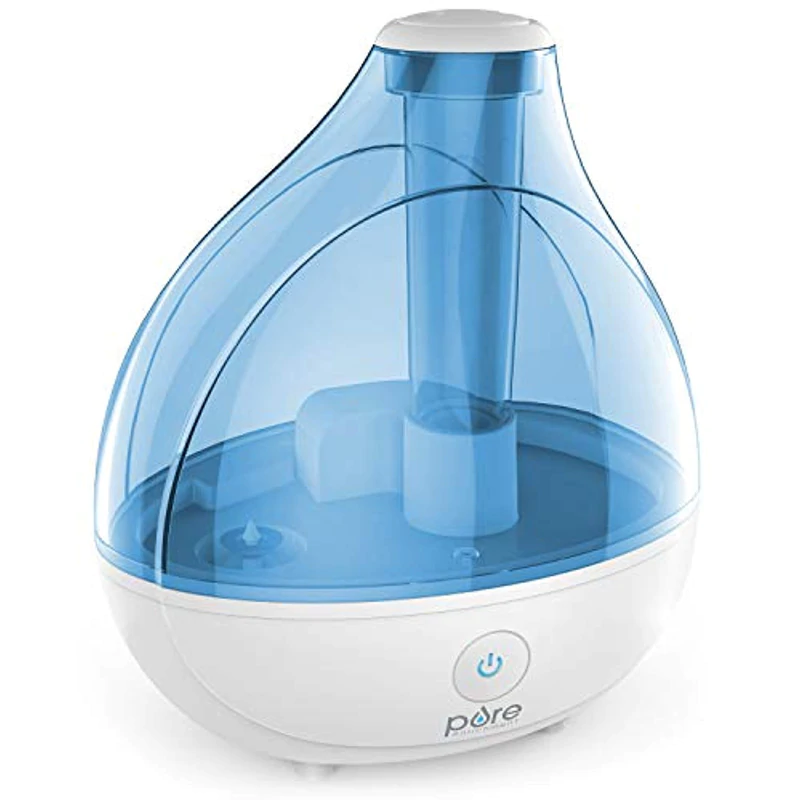
Features:
Ultrasonic Cool Mist technology hydrates dry air safely and quickly for up to 25 hours, allowing you to breathe easier and get a more restful night’s sleep. High and low speed settings combined with a 360° spray nozzle help you consistently balance and regulate the humidity in your home year-round to relieve cold symptoms and sinus problems. The 1.5L water tank provides ideal coverage for bedrooms, offices, nurseries and other medium-sized rooms. An optional night light provides a soothing glow, while an auto-off feature turns the humidifier off when the water level is low or the tank is removed.
PureGuardian H965 Ultrasonic Cool Mist Humidifier for Grow Room
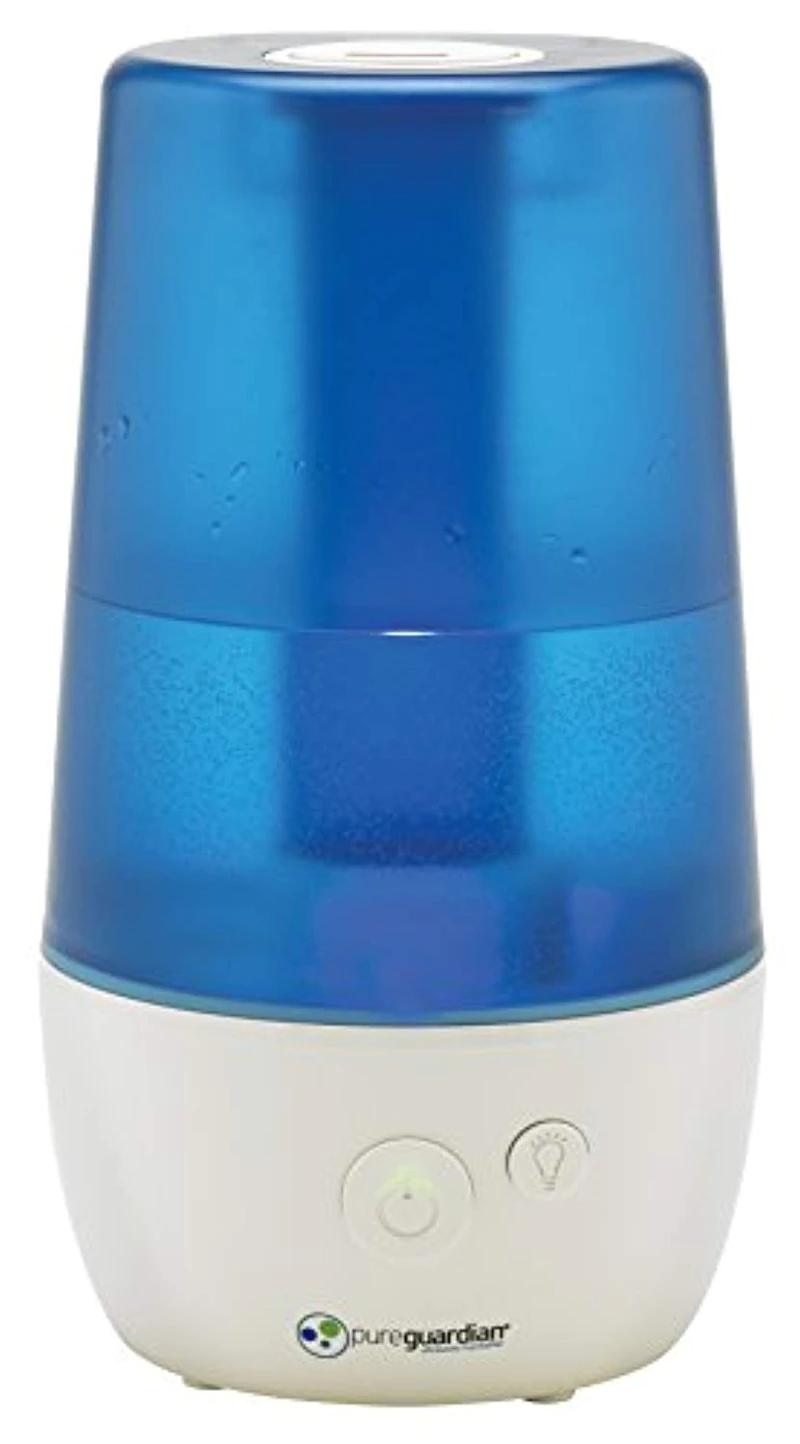
Features:
The PureGuardian H965 Ultrasonic Cool Mist Humidifier prevents dry air in your home and is ideal for those with colds, allergies and dry skin. The easy-to-fill 1-gallon tank is perfect for a 320-square-foot room and can run for up to 70 hours. Silver Clean prevents slimy mold and the growth of tank surfaces — a common problem with traditional humidifiers. The aromatherapy tray option helps create a relaxing environment with your favorite essential oils. Oil not included. Create a better home environment and optimize your comfort with an ultra-quiet, soothing cool mist. This benchtop humidifier has a low water level indicator that lets you know when to refill the tank. The night light feature makes it a great addition to a kid’s room.
How to Choose the Right Humidifier for a Grow Tent
Before we step into the review, I would like to teach you a few tricks to make the best purchase of your plants.
How so?
I’ll speak about a few things needed to consider before buying a humidifier for tents, which will bring forth the best yield from your plants.
Budget
Without setting the right budget, you can’t make the right purchase. So you need to fix a budget for your humidifier.
Usually, a good humidifier, whichever type you buy, will set you back around $50.
Pretty sweet, right?
If you want other added features, you might have to go a little over the 50-dollar mark. But it completely depends on the humidifier.
The Type
I’ve already mentioned what types of humidifiers there are. But do you know why you might want to buy one of these types?
I’ll give you a brief!
Cool Mist Humidifier: This one uses the water already in your tent and releases a cool mist to cool down and humidify your room. You can use it if your tent is usually too warm.
Warm Mist Humidifier: As the most used because of its affordability, this humidifier can kill bacteria as it warms up the vapor before releasing it to your grow tent. It can warm up your tent.
Ultrasonic Humidifier: It does both! If your grow tent gets too hot sometimes or cools down too much, depending on the temperature, you can set one of the two settings with this humidifier. It’s not the cheapest, but it can manage the temperature of your grow tent well.
The Noise
You won’t want your humidifier to be too noisy for a plethora of reasons. Some humidifiers are noisier than others. You should check for the noiseless feature before you buy one.
Generally, what to expect?
If noise is your concern, you should get the ultrasonic one, as I did. This type of humidifier is the quietest.
The cool mist one makes the most noise, while the warm mist humidifiers will make a lot less noise than the cool mist humidifiers.
Grow Tent Size
You have to consider the size of your grow tent before you decide on a specific size of humidifier.
For a small grow tent the size of 2×2 feet, you will be better off with a humidifier of around 20 m² size, which is usually the smallest you can find.
And this size can easily cover the 4 m² space of your grow tent!
Hygiene and Maintenance
You wouldn’t want your humidifier to cough up bacteria inside your grow tent, harming your plants.
Plus, you need to know how often you need to clean your humidifier too!
Usually, you can easily clean cool mist humidifiers, but the maintenance is costly. And bacteria can come out through the mist it creates.
With warm mist ones, you might have a hard time cleaning them, but the bacteria die from the heated water.
Lastly, the ultrasonic one is easier to maintain, and they come with filters, which you don’t have to change too often.
Conclusion
We reviewed various products on the market. All models are of top quality and the best in the market, you can choose any model that meets your requirements. We hope we’ve made it easy for you to find the right plant for you, or you can buy one for yourself and make your plant happy with this wonderful gift.
Best Smell Proof Containers in 2023
There is something to be said about the protection and anonymity that the anti-odor bags offer users. This is an essential bag that every drug addict needs to add to their arsenal. Not only will the bag mask the smell of potent herb, but people won’t wrinkle their noses when you walk past them in disgust.
It allows you to carry herbs discreetly. Plus, it limits the chance of losing herbs, like what can happen when using thin plastic wrap. So, if you are looking for the best brands to buy Smell Proof Bags, read this article for more analysis.
Why do you need an Odor Resistant Storage Bag?
Humans have used herbs for its psychoactive properties for centuries, but the plant has only recently been legalized in many jurisdictions. That means people who want to reap its benefits must now find new and creative ways to store their herbs. The best odor-resistant storage bins are one of the most popular options out there.
This type of container is made of a material that doesn’t allow odors to escape, making it ideal for those who don’t want neighbors or family members to know about their habits. Additionally, these boxes are often equipped with locks or other security features that make it nearly impossible for anyone to gain access to your stash without your permission.
ECO Farm Container Bag Storage Case
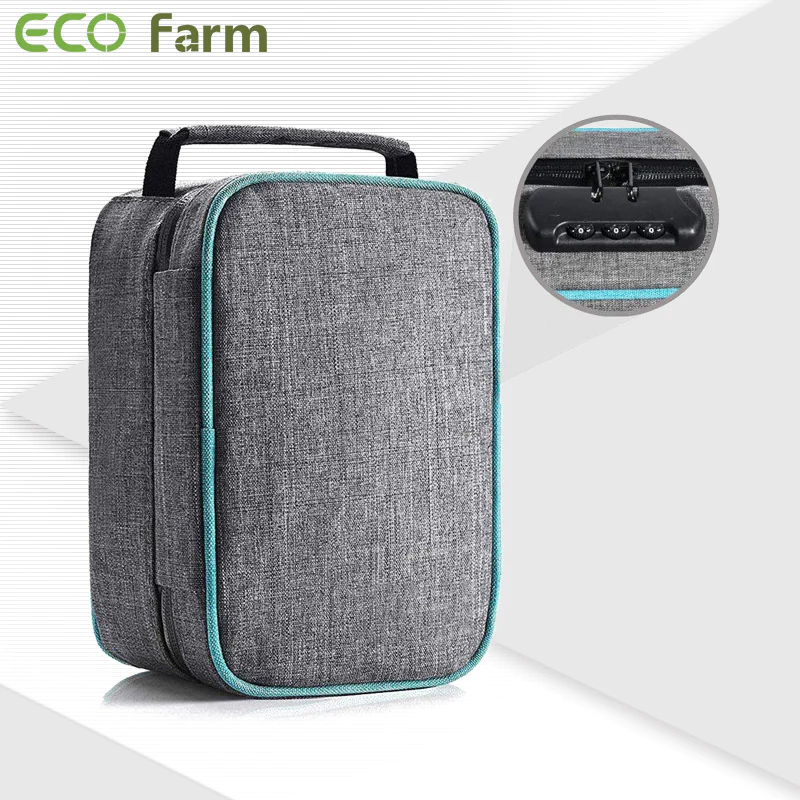
Features:
The shell material is the same durable multi-layer carbon filtration system, and a handy slip pocket has been added to the front of the shell for small items you might want to keep with you, such as your fishing license or map. Inside there is a removable storage compartment with a slip pocket and another pocket. The main body has two removable and movable dividing wall pieces that allow you to set up space for your items.
Abscent Odor Absorbing Container Bag

Features:
The Bag by Abscent Minded is an inhaling travel size bag. Abscent’s toiletry bag is just the right size for all your small essentials. The carbon in this bag has a 2 year lifespan before it starts to smell. Double lined premium activated carbon lining, new antimicrobial lining for carbon protection, H2O-guard zipper for 100% protection, water resistant exterior and roomy main compartment.
Herb Guard Premium Smell Proof Case
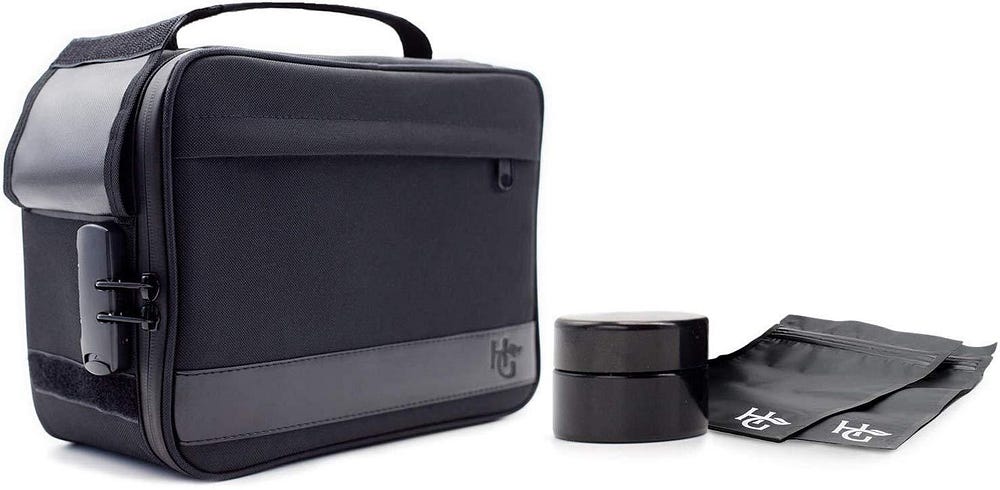
Features:
Have full confidence knowing the Herb Guard Bag contains all smells while keeping your goods fresh! The perfect combination to store your Coffee, Dried Foods, Spices & Teas, no smell escapes with this stylish bundle. The essential travel and storage bag is small, compact, and extremely light enough for easy travel with an easy-grip handle. The Herb Guard Container has a sleek and stylish design that looks great in your home or while traveling.
How to choose the best smell proof bags online?
Choosing the best smell proof bags can be difficult, but with some research and knowledge, you can find the right one for your needs. When choosing a smell proof bag, keep the following factors in mind:
Look for odor-blocking bags made of activated carbon, mylar, or military-grade fabric. These materials are effective at absorbing and neutralizing odors, keeping your herbs fresh and odor-free.
To prevent odors from escaping, the bag should have an airtight and leak-proof seal. To ensure the best odor protection, look for bags with strong zippers, double-sealing technology, or vacuum-sealing capabilities.
Select the appropriate size for your needs. Smaller bags are ideal for carrying small items such as herbal blends, whereas larger bags are better suited for carrying bulkier items such as clothing or camping equipment.
Look for bags made of high-quality, long-lasting materials that can withstand daily use. This will ensure that the bag lasts a long time and does not easily tear or rip.
Smell proof bags are available in a variety of styles, ranging from discreet and compact to stylish and eye-catching. Choose a style that meets your needs and personal preferences, and make sure the bag is lightweight and portable.
These bags range in price from low-cost options to high-end, premium bags. Determine your budget and look for bags that provide the best value for your money, taking quality, durability, and odor protection into account.
Consider the brand’s reputation before purchasing. Look for brands with a proven track record of producing high-quality, odor-blocking products. To make an informed decision, read customer reviews and ratings.
By taking these important factors into account, you can ensure that you select the best smell proof bag for your needs.
Conclusion
The above-mentioned deodorant bag is convenient to carry, strong and reliable.
But if you’re looking to step up your collection game, ECO Farm is one of the best smoking accessories brands out there today.
Our odor resistant bags are made with high quality materials and features. It keeps your herbs safe and dispersed.
Top Plant Grinders Reviewed In 2023
Looking for a cool grinder? Maybe you need an electric grinder. Or a manual grinder with titanium teeth. Read on to discover the best cool grinders available right now.
Why use grinders?
While breaking down a bud with your fingers will get the job done, this method will ultimately waste all that precious plant pollen due to the trichomes getting stuck on your fingertips.
That’s where a grinder comes into play.
Designed to finely grind down your plants in order to provide a smooth, slow, and consistent smoke, using an herb grinder will make your bowl, joint or any inhale-able method of consumption that much better.
You see, finely ground plants means more THC crystals getting absorbed during combustion, giving you more potent effects from whatever strain you’re exploring at the moment.
To put all of this into perspective, you just need to remember one phrase: the finer the cut, the finer the high.
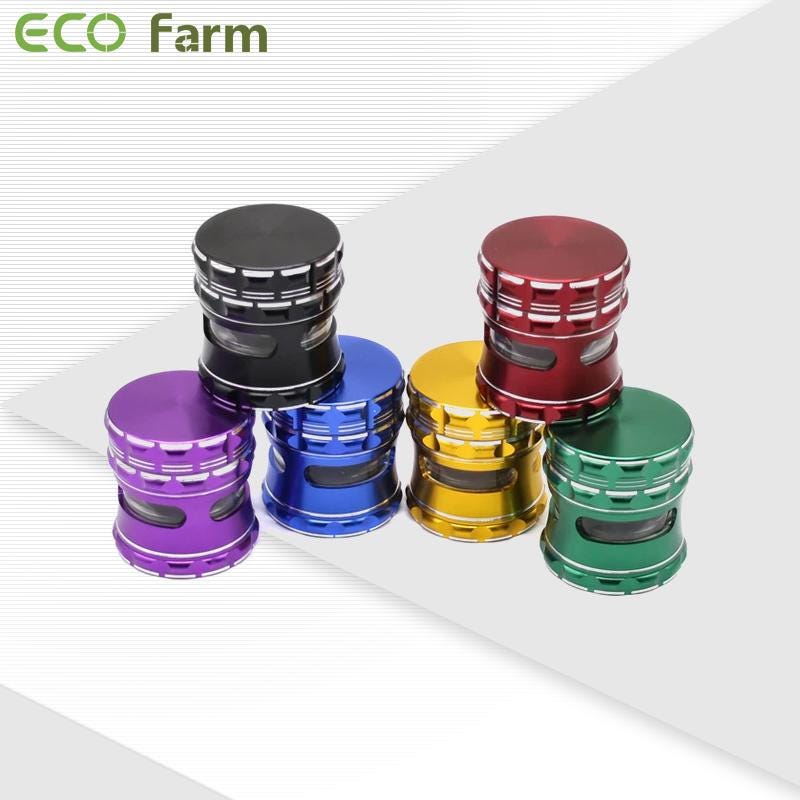
ECO Farm Medicinal Plants Grinder

Features:
The ECO Farm grinder is made out of medical grade stainless steel, and gives you peak customization when purchasing: you can choose from a three-piece or a four-piece grinder, and you can choose between a coarse grind or a hybrid grind. The deep cutting area allows you to pack the grinder with a larger amount of product, and a stainless steel ball agitator gets all of the kief off of the grinder. Speaking of kief, the grinder has a kief catcher and additional scraper.
Kcanabears Mini electric vanilla grinder
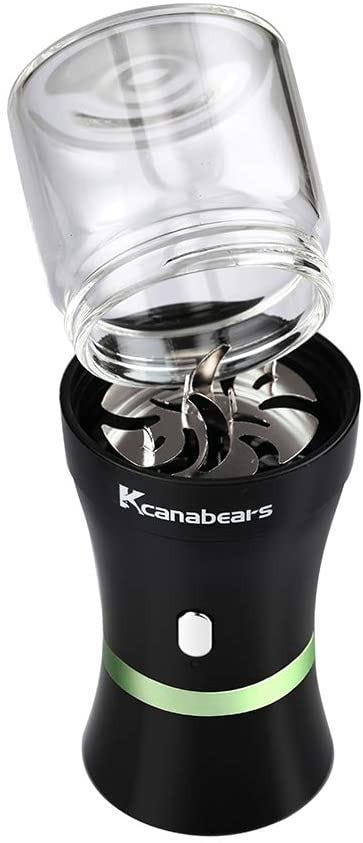
Features:
In addition to grinding dry spices, it can also grind fresh or viscous herbs. The durable stainless steel blade can easily grind coffee beans and spices. One is used as a pollen collector and the other is used for replacement or storage. Product size-2x4.8 inches weighs only 135 grams, very suitable for your outdoor travel. Passed CE and ROHS certification, the electric tobacco grinder is equipped with an 1100 mAh built-in high-power battery, a safety lock, and a blue light completion indicator. The blade of the grass grinder is made of stainless steel, and the lid is made of food-grade materials; it is equipped with a key lock, child lock, short circuit protection, low voltage protection, low current protection, and so on.
Cali Crusher Grinder 4 Piece Black

Features:
Cali Crusher brand products are quickly becoming renowned for their amazing quality, yet affordability. This Cali Crusher 4 piece grinder features four stages, a perfect micron count screen, razor-sharp teeth, and neodymium magnetic closure. CNC machined grinders from one solid piece of aerospace aluminum, so no need to worry about the blade plate coming loose or teeth dropping out. This classic grinder design uses diamond-cut teeth to crush your herbs into a perfectly blended and fluffy consistency, keeping your fingers clean and your bowls evenly distributed. Make your buds ready for rolling with this practical Cali Crusher Grinder. Diamond-shaped teeth are highly efficient when it comes to grinding dry herbs easily, quickly, and effectively.
Factors to Consider When Choosing the Best Grinder
Materials: Metal and aluminum are ideal, but wood works too. While plastic grinders are not as durable, they do offer a more portable solution. The co-founder/CEO of plants accessories brand Hemper shared, “Materials for grinders range from metal to plastic — metal is more durable and long-lasting, while plastic is lighter.”
Teeth: The shape and quality of your teeth are important. You’ll want sharp teeth shaped like diamonds, although there are some toothless grinders that use blades or other mechanisms for grinding. A grinder with too many teeth can cause clogging, but not enough teeth can reduce the fluffiness of the grind.
SIZE: Do you like to grind your dogg and pre-chop or roll up a bunch of knuckles ahead of time? Or are you a light smoker who only likes to grind up right before you want to smoke? This will all affect the size you choose.
Budget: While you can certainly get a lot of decent grinders for $30.00 or less, investing a bit more is a better idea because a good grinder will last for years, while a bad grinder can last in a few months clogs and dulls the teeth.
While you can snip plant material with scissors or separate it by hand, a grinder is by far the most effective (and effective) method. Here are the best lawnmowers in every category in 2023.
Conclusion
It’s no secret that grinding your plants is the best way to get the most out of it. Not only does it make for a more even burn when you smoke or vape, but it also helps to release the active ingredients in the plant that provide all those amazing medicinal benefits. That’s why we’ve put together this list of the best grinders on the market today. No matter what your budget or needs may be, we’ve got you covered.
The 3 Best Humidifiers for Plants in 2023
Plant life depends largely on three variables: watering, light and humidity. If you can reproduce these three aspects in your home until they are similar to what the plant has accepted in its place of origin, then the survival, growth and development of the species are guaranteed. This may seem complicated, but it’s not about transforming your home into a tropical jungle it’s about knowing where plants come from plant needs.
One of the variables that confuses us the most when caring for plants is humidity, because although we can feel it, we can’t see it, making it somewhat difficult to understand and control; unlike factors like watering or lighting.
Advantages of the plant humidifier:
These Best Plant humidifiers have many benefits and benefits. It can enhance and change your lifestyle. Installing a humidifier in your home provides you with many basic benefits. These humidifiers are not only good for plants, they are good for us too.
In highly humid climates, most germs and bacteria are automatically eliminated. Use a humidifier to inhibit the growth of mold and fungus on the bottom of the tank. Due to this mold, the bacteria are dispersed in the atmosphere in the form of a mist. It provides your houseplants with actual moisture as needed, helping your plants grow healthy and preventing them from looking dull and dry. It keeps your plants healthy and happy. Because in winter, the air is mostly dry, which can affect the color of the plants and cause the leaves to fall off the plants.
That is why to prevent this dry air we must have a humidifier in our home. Plants grow healthily if the air is warm, and in a humid climate the air is warmer than in a dry atmosphere. Our plants need 40% to 60% moisture content so that the humidifier can quickly meet the plant’s needs. Both above and below this level will affect your plants. To avoid this, you do have a hygrometer in your home to see the moisture levels.
These humidifiers are also essential for us to protect us from many allergies and relieve coughs and nasal congestion. These humidifiers also provide temporary relief from colds, and they kill germs and bacteria that are mainly present in dry air and pose a serious threat. So, by having a humidifier in your home, you can reduce all of these threats.
ECO Farm Hydroponics 8L Capacity Air Humidifier Grow Room Tent

Features:
This ECO Farm humidifier can kill 99.9% of bacteria in water, thus atomizing sterile water into your home to increase humidity. Users of this humidifier find it durable, easy to clean and quiet to use. When set to “low”, the unit makes very little noise but adds enough humidity. Its powerful humidification is enough to keep your room comfortable all day long. The nozzle and output knobs of our plant humidifiers are very easy to adjust. With the 360° rotating nozzle and output knob, you can easily adjust the humidity to suit your space. The most serious problem reported by humidifier users is growth in the tank. This may be due to neglect to clean and maintain your humidifier, usually once a week. Our cool mist humidifier is very user-friendly, with a large opening that allows you to reach into the tank for cleaning, making cleaning and filling easier.
Pure Enrichment MistAire Ultrasonic Cool Mist Humidifier
Features:
Ultrasonic Cool Mist technology hydrates dry air safely and quickly for up to 25 hours, allowing you to breathe easier and get a more restful night’s sleep. High and low speed settings combined with a 360° spray nozzle help you consistently balance and regulate the humidity in your home year-round to relieve cold symptoms and sinus problems. The 1.5L water tank provides ideal coverage for bedrooms, offices, nurseries and other medium-sized rooms. An optional night light provides a soothing glow, while an auto-off feature turns the humidifier off when the water level is low or the tank is removed.
PureGuardian H965 Ultrasonic Cool Mist Humidifier for Grow Room
Features:
The PureGuardian H965 Ultrasonic Cool Mist Humidifier prevents dry air in your home and is ideal for those with colds, allergies and dry skin. The easy-to-fill 1-gallon tank is perfect for a 320-square-foot room and can run for up to 70 hours. Silver Clean prevents slimy mold and the growth of tank surfaces — a common problem with traditional humidifiers. The aromatherapy tray option helps create a relaxing environment with your favorite essential oils. Oil not included. Create a better home environment and optimize your comfort with an ultra-quiet, soothing cool mist. This benchtop humidifier has a low water level indicator that lets you know when to refill the tank. The night light feature makes it a great addition to a kid’s room.
Properties That Make Humidifiers Beneficial For Plants
Humidifiers are made for humans, not plants, so there are a few features that aren’t perfectly calibrated for our houseplants. That said, here are a few things you should be aware of when choosing the right humidifier for your plants:
Runtime — At least 12 hours of runtime, preferably more than 24 hours. You don’t want to keep refilling it.
Simple Design — You’ll be using your humidifier more than most, so it must be easy to maintain and disassemble.
Small and attractive — these are not required features, but I personally like to see a well-designed compact humidifier!
These rules break down if you want to increase the humidity in a larger space like a greenhouse. You should probably use a mister or fogger to humidify a space of this size.
How to Best Use a Humidifier
It’s not enough to just put a humidifier in your garden, turn it on, and expect your plants to thrive. You must also create an environment conducive to increased humidity.
Proper airflow is a must, not least because many diseases thrive in higher humidity. If you let water condense and sit on your plants, you’re on the lookout for leaf spot fungus and all sorts of other diseases.
Here’s a good basic setup for high-humidity environments and moisture-loving plants:
Fans for increased air circulation
Tray filled with water and pebbles to collect extra moisture
Temperature and humidity monitors to track levels
Maintain Your Humidifier
A good rule of thumb is to thoroughly clean the humidifier several times a month. Because you’ll be using it a lot, you’ll develop salt, fungus, or mold faster than other users.
To clean, simply take the humidifier apart and soak the parts in a mixture of water and vinegar.
Conclusion
A humidifier will help prevent dry and damaged leaves in winter. However, with the sheer variety of humidifiers on the market, choosing the right one can be overwhelming.
We hope this list gives you a better idea of what features to look for when shopping for a humidifier. However, if you are still struggling to maintain proper indoor humidity levels for your plants, you may wish to choose a less tropical species. A good place to start is our guide to the top cacti that can thrive in even the driest of homes.
Why Do Growers Use Bud Trimmers? (2023 Updated)
Many people think they don’t need a bud trimmer. Here’s why they’re wrong. Bud trimmers are the ultimate cost-saving item. It could save you an entire weekend or hundreds of dollars in labor costs.
Some people are uncomfortable spending a few hundred dollars on an item that they only use once a year. Of course, you can call a few friends over. Trimmed the buds all weekend. Still, it’s tedious and mind-numbing work. It’s like shucking corn. In return, each of your friends will be fired.
If you’re in your second or third growing stage, it’s time to buy a bud cutter. We have bud trimmer reviews so you can choose the best bud trimmer for your growing operation.
Trimming Method: Wet, Dry, or Both?
Consider whether you need a wet, dry, or a hybrid 2-in-1 wet & dry machine. Remember that trimmers process wet buds faster, and dry buds, while more potent and flavorful, take more time. Also, a hybrid wet & dry trimmer consumes less space than having different trimmers, and having a dedicated dry trimmer gives you the processing efficiency of wet trimmers.
When choosing a bud trimmer, you need to weigh the most important things. But if you know what kind of buds you will be processing, consider following the size.
ECO Farm 18inch Table Automatic Leaf Trimmer Machine
Features:
This ECO Farm Bud Trimmer is a great device for trimming and shaping flowers, buds and spices. This powerful trimmer features a maintenance-free motor and sharp stainless steel (3) blades. Automatic output when finished, it comes with a clean and environmentally friendly tote bag; No litter left behind. It trims excess leaves and stems quickly, efficiently and preciously. Easily foldable design for easy transport or storage. And the speed of this bud trimmer is adjustable. High-speed blades and fans trim spin, fluff, and ultimately eject trimmed plants.
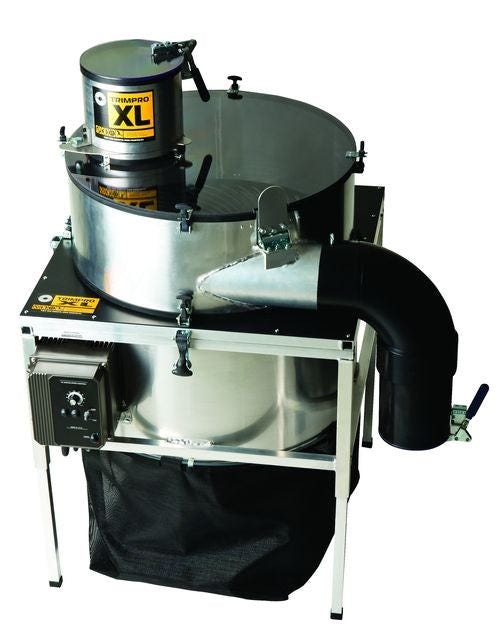
Features:
To respond to the needs of larger producers, the TRIMPRO trimmer has a capacity and productivity ratio 5 times greater than its baby brother, the Trimpro Automatik. The TrimPro XL trimmer’s fluted design of the grate facilitates the plants movement. When combined with the dimmer on the motor regulating the whirlwind velocity plus the height adjustable six (6) blade assembly, the operator is always in full and precise control of the XL and the finished product.

Features:
Pro-Cut P2X is an easy to use trimmer that provides you with the benefit of trimming through all of your plants that need trimming. The Pro-Cut P2X leaf trimming machine can trim yields in minutes. With this leaf trimmer separating excess leaves and twigs from a mess of plants and flowers becomes easy. So you don’t have to worry about sorting things here. Alongside, the Pro-Cut P2X garden machine can also trim plants and small bushes like oregano, basil, rosemary, mint, lavender, coriander and parsley. Once the leaves are trimmed, you can then use it for multiple purposes. And the best part: it works quietly which means no more headaches!
Why do growers use bud trimmers?
1. Save time
The biggest advantage of using a bud trimmer is that it is efficient and time-saving. As mentioned earlier, hand pruning a pound of flowers takes one person about four to ten hours.
Some bud trimmers can trim up to 172 lbs per hour if run in tandem! It’s not just a significant difference — it’s a game-changer.
If you’re a commercial grower, these substantial time savings can have a dramatic impact on your bottom line. You can reallocate the time your employees should spend on other essential tasks, such as packaging, marketing or distribution.
2. Save money
Using a bud trimmer will not only save you time, but money as well. This may seem odd since you obviously have to buy trimmers, and it costs money, but you don’t have to hire as many workers to do the trimming by hand.
You also don’t have to worry about product spoiling because your skeleton crew can’t trim everything fast enough. As a bonus, it also means not having to deal with the hassle of lazy workers who may or may not show up, or worse, people who steal.
Reducing your labor costs will reduce your overhead and thus your profits. By reducing the time it takes to get products out of the factory and on the market, you can even increase productivity, which means more money in your pocket. Efficiency is probably the second biggest advantage of using a bud trimmer.
3. Ensure consistency
Another benefit of using a bud trimmer is that the buds will be more even. When pruning by hand, especially with large crops, there are many people pruning, which means many different levels of skill and effort.
Unless you run a very strict boat with strict quality control — which adds more time to the harvesting process — the chances of product variance are high.
With a bud trimmer, each bud is trimmed in the same way and the final product will remain consistent throughout. For your end buyer — this matters.
Skill level is also a factor in machine pruning over hand pruning. You don’t need to train the machine or worry about it doing a really bad job, as long as you have a good machine, that’s it.
Conclusion
Proper trimming is what customers associate with and expect from a quality product. Trimming is one of the final checks and is critical to not only producing a more aesthetically pleasing product, but also to preserving resin glands (trichomes). Thanks for reading!
The Most Important Factors to Consider While Choosing an Inline Duct Fan in 2023
If you’ve ever been inside a greenhouse, you’re likely no stranger to the hot, sticky, and humid feeling that comes along with it. Though your grow tent may not be as large-scale as a greenhouse, it can easily get very hot and humid. Though your plants may love humidity and heat from grow lights, too much of a good thing can quickly become a problem. Fans are one way to help create the optimal environment for growing, yet knowing how to use them effectively can sometimes feel tricky.
At Tree of Life, we love sharing our passion for hydroponic growing with you. We know that getting started with or troubleshooting hydroponics can be overwhelming; that’s why we are here to simplify your growing setup. In this post, we answer some of the most commonly asked questions about both intake and exhaust fans for hydroponic growing. From whether or not you need them, to helping you set them up, we want to boost your success and make growing more fun.
Advantages of Using Inline Fans in Grow Tents
Noise reduction: Since you install the fan in the appropriate area, the noise level in the room you are cleaning will be negligible. Also, if you have a fully insulated roof space, or on the other hand, assuming you’re leaning towards quieter models, you’ll benefit from quieter fans.
Duct Run Length: Inline fans are designed to be used with ducts. This means they hold a lot of the capacity shown compared to the base fans. This is useful if the distance from the point of extraction to the power source is considerable.
For example, say you need to exhaust raw air from your grow tent, the length needs to be as short as possible. Subsequently, this will help improve the fan’s ability to deliver clean air.
Multiple Inlet Points: With an inline fan, it is not difficult to make several air inlets or outlets using DIY techniques. These features are critical when you have a huge growing space and need to have several points of air intake.
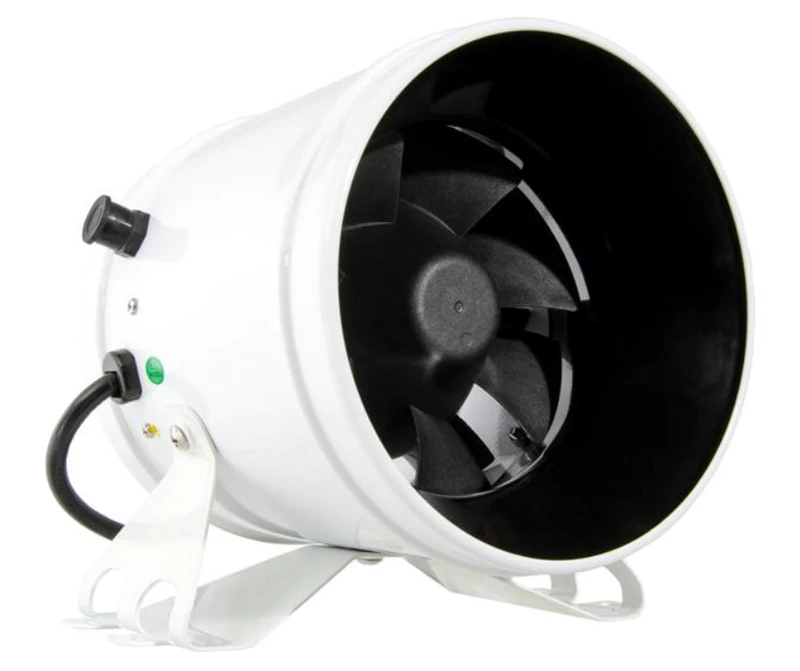
ECO Farm 8 Inch In-line Fan Exhaust and Intake Fan for Grow Room
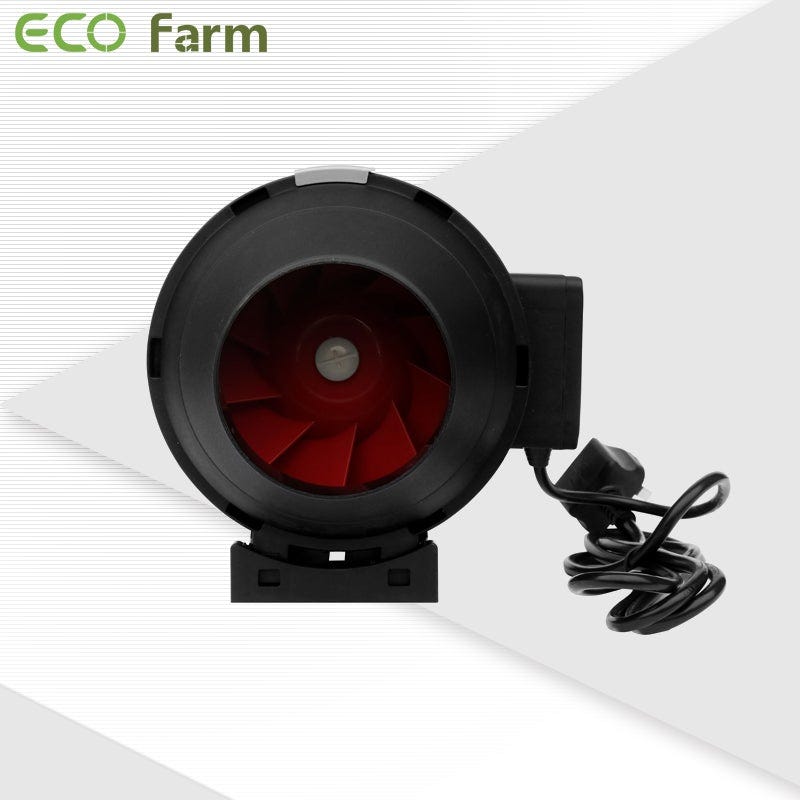
Features:
For the combination of power and quiet, ECO Farm inline fan is the perfect choice. Even at the highest power setting, it is very quiet. Due to the use of a pulse width modulation (PWM) controlled DC motor, its quiet noise level is only 37dBA. This motor uses less power than standard AC motors. In addition to a quiet motor, this fan also has an adjustable speed setting. The airflow is 390 CFM, which is very suitable for medium-sized planting rooms. In order to install the fan, the machine and wood mounting screws are included to assist in the installation.
Can-Fan Max Fan Pro 6" Mixed Flow Inline Fan 420 CFM
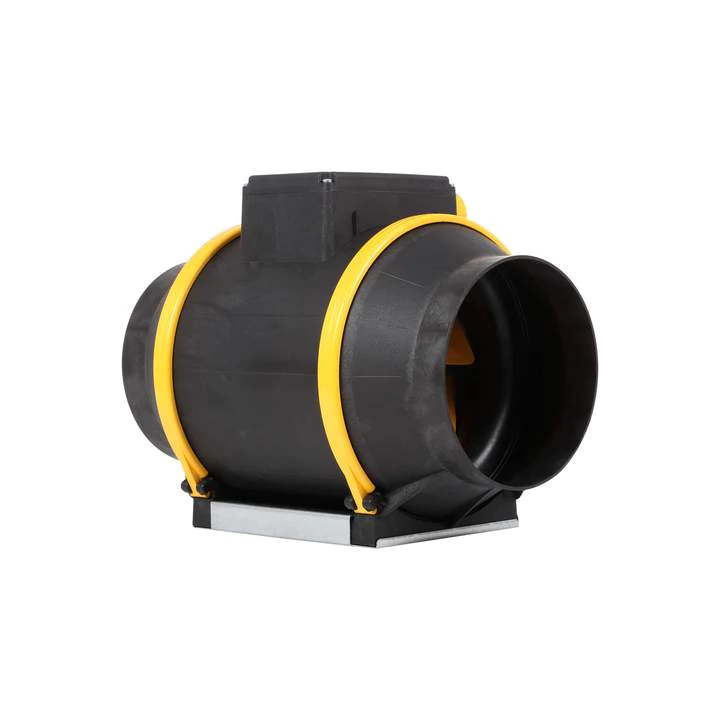
Features:
The Max-Fan® Pro Series is even more efficient and stronger than the original Max-Fan® design. The Max-Fan® Pro Series has a much more robust housing due to the fiberglass reinforced plastic compounds that meet all of the UL and CSA requirements. The fans have three control speeds for true performance. These fans run quieter than the Max-Fan®. The fans come with the EZ Mount™ bracket for easy mounting.

Features:
Controlled by a 32-bit microprocessor, these powerful mixed-flow digital fans deliver outstanding performance and value. Available in 4", 6", 8" and 10" models, Jetfans is the ideal solution for your ventilation needs. Because the motors in these fans are EC (electronically controlled), they offer very high efficiency, reliability and controllability. They include a highly precise speed control unit that can be detached from the fan and power cord if desired. Low power consumption — Jetfans run only 25% of the power of comparable inline fans Their EC motors are efficient, reliable and responsive to speed control ETL certified
The Most Important Factors to Consider While Choosing an Inline Duct Fan
You should have no trouble finding an inline duct fan to add to your HVAC system because many alternatives exist. Besides the fan, you might also need other things to make the system run more efficiently and ensure the fan always has fresh air. So, let’s look at some more things that can search for an inline duct fan to go faster and more quickly.
SIZE:
The 4-inch, 6-inch, and 12-inch sizes are some, that you can buy. An equation can help you figure out how big your grow tent or room should be. First, determine the cubic feet of the grow tent/room where the inline fan will be put. To do this, multiply the length, width, and height of the room/tent by that number.
AIRFLOW:
Airflow is typically measured in (Cubic Feet per Minute), which is how much air the fan moves in a minute. This is actually the amount of air the fan can move in that particular time. If you know how big your tent is, you can choose the right CFM for an inline fan.
SOUND:
In general, no one likes noise, especially regarding appliances used in the home. It’s common to see product descriptions for inline fans that truly describes the amount of noise the product produce. Make sure you check the noise level of the inline fan, before you buy one. If you set the fan speed too high, it will make more noise. Other than that, if you slow down the speed, the less noise it makes.
SPEED:
Automatic controllers are found on most inline air fans. This means that you can set the speed of your fan with them. It would help if you controlled the speed of the fan to keep the humming and the amount of air your plants get from the fan down.
PRICE:
There are a lot of cheap inline duct fans on the market, but there are also some that cost a lot of money. It would be best to choose what fits your budget and works well in your grow room or tent.
Conclusion
That wraps up our review of the best inline duct fans. We have provided elaborate descriptions for each of the products to help you make an informed purchase.
The Complete Guide to Plant Grinders of 2023
When you have a lot of plants, you need to find a way to grind them efficiently. After all, your goal is to get as much as possible out of each bowl and into the next. In order to achieve this, you need the right grinder for your needs. There are a few things you should keep in mind when choosing the best grinder for your needs. In this article, we explain what makes a good grinder and why you should choose one over another. We’ll also give some advice on how to choose the perfect grinder for your needs.
Benefits of a Quality Grinder
First and foremost, a high-quality grinder will produce a more consistent, evenly ground vanilla, resulting in smoother, more pleasing smoke. It will also be more durable and long-lasting because it is made of higher-quality materials and has a more efficient grinding mechanism. This means you won’t have to replace your grinder as often, saving you money in the long run.
Also, a good quality grinder will often have extra features, such as multiple chambers for collecting and storing the kief, and different grinding options for the perfect consistency. These features can further enhance your smoking experience and allow you to customize your herbal preparation to your liking.
Overall, the benefits of a quality grinder far outweigh the initial investment, making it a worthwhile investment for any enthusiast.
ECO Farm Medicinal Plants Grinder
Features:
The ECO Farm grinder is made out of medical grade stainless steel, and gives you peak customization when purchasing: you can choose from a three-piece or a four-piece grinder, and you can choose between a coarse grind or a hybrid grind. The deep cutting area allows you to pack the grinder with a larger amount of product, and a stainless steel ball agitator gets all of the kief off of the grinder. Speaking of kief, the grinder has a kief catcher and additional scraper.
VIVOSUN 2.5" 4 Pieces Herb Grinder Black Aluminium Spice Grinder with Pollen Scraper

Features:
VIVOSUN herb grinder adopts high-quality aluminum alloy and a strong magnetic cover to make the equipment more durable. The magnetic lid helps you hold the herbs firmly and reduces spills. The stainless steel mesh screen helps to collect the fine powder. Using the free scraper, you can easily collect and remove the remaining pollen from the grinder. VIVOSUN Herb Grinder contains ultra-sharp teeth, which can perfectly grind every part of the herb, from lighter herbs to dense grinds, and now only requires a few twists. These teeth can stay sharp for a long time and are easy to clean. The grinder has unique wave grips on the top and bottom of the grinder. This design makes the grinder easy to hold and twist when grinding herbs. Only a few simple twists can get a fine powder.
Wakit Electric Herbal and Tobacco Grinder
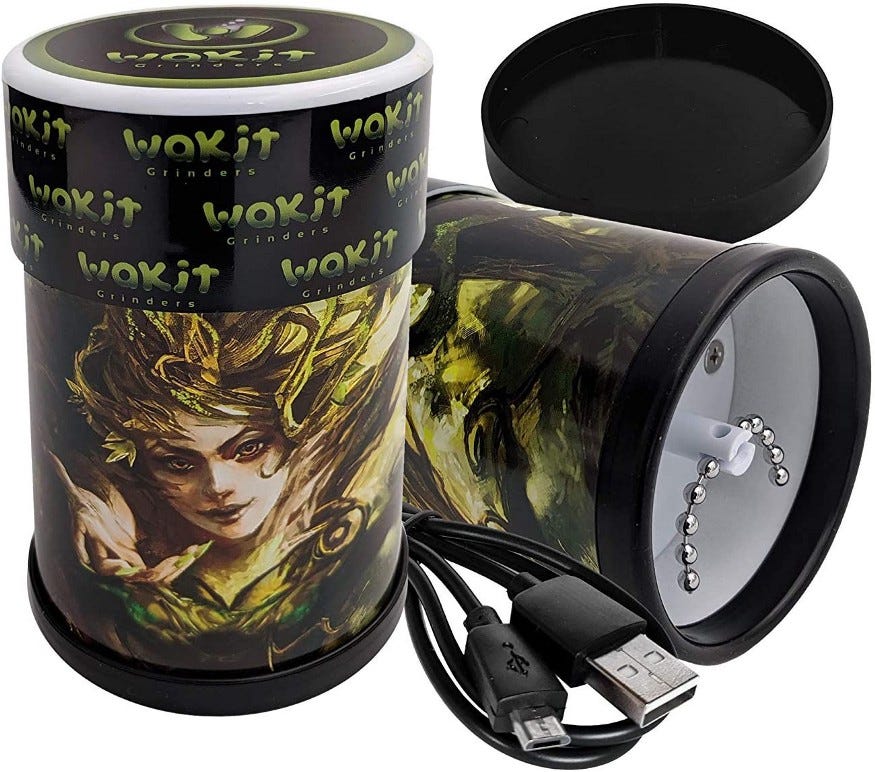
Features:
A ball and chain patent design, spins effortlessly at high revolutions cutting through herbs, trimming thick stems away. While grinding, Wakit preserves more of your expensive herb and its properties without waste of active botanicals. Wakit Grinder is incredibly easy to use, for everyone, and there is no assembly needed. The rechargeable electric herb grinder with patented ball & chain technology grinds your herb with a few taps in less than 5 seconds. Electric Herb Grinder Unique Patented Ball and Chain Technology Grinds Spices & Herbs in Seconds — Perfect Grind as You Control the Grind and Texture Without Wasting Herb
What to Look for in a Good Grinder
Pieces and layers: A no-frills, inexpensive but solid two-piece grinder — — that only grinds is adequate for doing the plants. And that’s also where the upgrade starts. You can get a grinder with diamond-cut teeth that’ll slice and dice the plants into a fluffy mound. You can get one with a mesh screen that’ll sift out the chunks and preserve the extra-potent pollen. And a big upgrade is a grinder with a storage compartment that’ll ensure not a gram of the bud goes to waste. Basically, the more pieces it has — ideally at three or four — the better, especially if these extra layers come with kief catcher and/or pollen scrapers, which they do most of the time.
Material: Per usual, you’ll want something that can last. But for grinders, a durable shell alone won’t cut it. The teeth need to be as durable and razor-sharp to mill even the thickest nugs into a nice grain for rolling and packing. In general, it’s: Plastic < aluminum < zinc alloy < stainless steel.
Size: 2-inch, 2.5-inch, 3-inch, When you see these specs, note that they’re referring to the size of grinder as determined by the diameter of its loading disc — where you stack in the herb — not the length (unless stated otherwise). As with most good things, the bigger, the better — meaning the more flower you can load in for a big-sesh grind. And the 3-inch mark is where a large grinder hits.
Conclusion
When choosing a grinder, it is important to consider factors such as size and portability, materials and durability, grinding mechanism, number of chambers, kief catch, and price point. Each of these factors affects the overall efficiency, convenience, and durability of your grinder and should be considered based on your individual needs and preferences.
Do LED Grow Lights Really Help Plants Grow? (2023 Updated)
Most growers today are aware of the advantages of running LED (Light Emitting Diode) lights compared to HID (High Intensity Discharge) lights as the best horticultural LED grow lights are at least 50 more efficient than the best double ended HPS or CMH lights %. LEDs convert 50% more electrical energy into light.
Benefits of Using LED Strip Lights for Plant Growth
There are a few benefits of using LED lights for plant growth.
Energy-Efficient
Strip lights are more energy-efficient than traditional grow lights. They use less power and last longer, so you’ll save money in the long run.
Long Lifespan
LED strip lights also have a longer lifespan since they last for 50,000 hours or more, so you won’t have to replace them as often.
Low Heat Output
LED strip lights produce very little heat. It means you won’t have to worry about burning your plants with the heat from the LEDs
ECO Farm ECOZ 510W Samsung 301H Chips LED Grow Light With Separately UV+IR Control
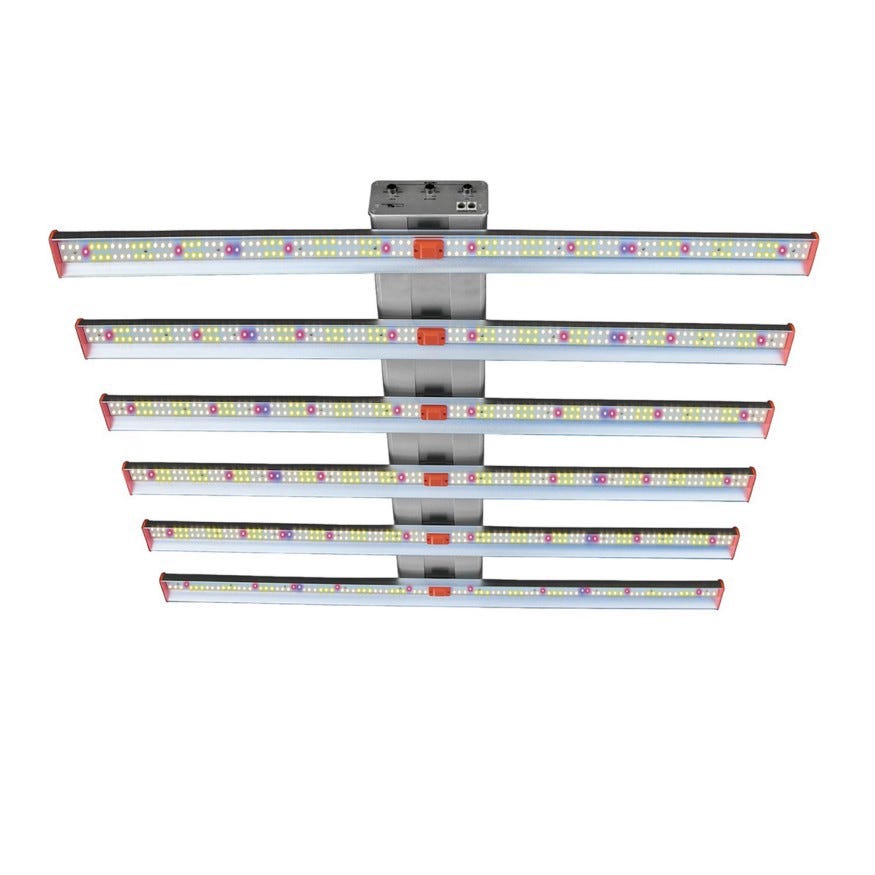
Features:
The ECO Farm grow light is Built with the best parts, Top Bing Samsung LM301H & Osam Chip and brand driver for higher efficacy and longer lifespan; to ensure high-efficiency PPE 2.75umol/J, better heat dissipation, and long service life. Compared with old plant lights, the average PPFD is increased by 30%, and the yield and quality are increased by 50%. With 6 LED growth lights, each rod is covered with high-grade glue, waterproof, and easy to clean, not easy to be filled with dust. This plant growth light also uses a special dimmer, which can precisely adjust the brightness. 0–10 levels are optional. This means that you can see clear brightness levels and record while adjusting. No need to worry about differences. Full-Cycle Sunlike Spectrum, close to natural sunlight. The spectrum applies to the entire stage of indoor planting.
BESTVA BAT W400 Dimmable LED Grow Light
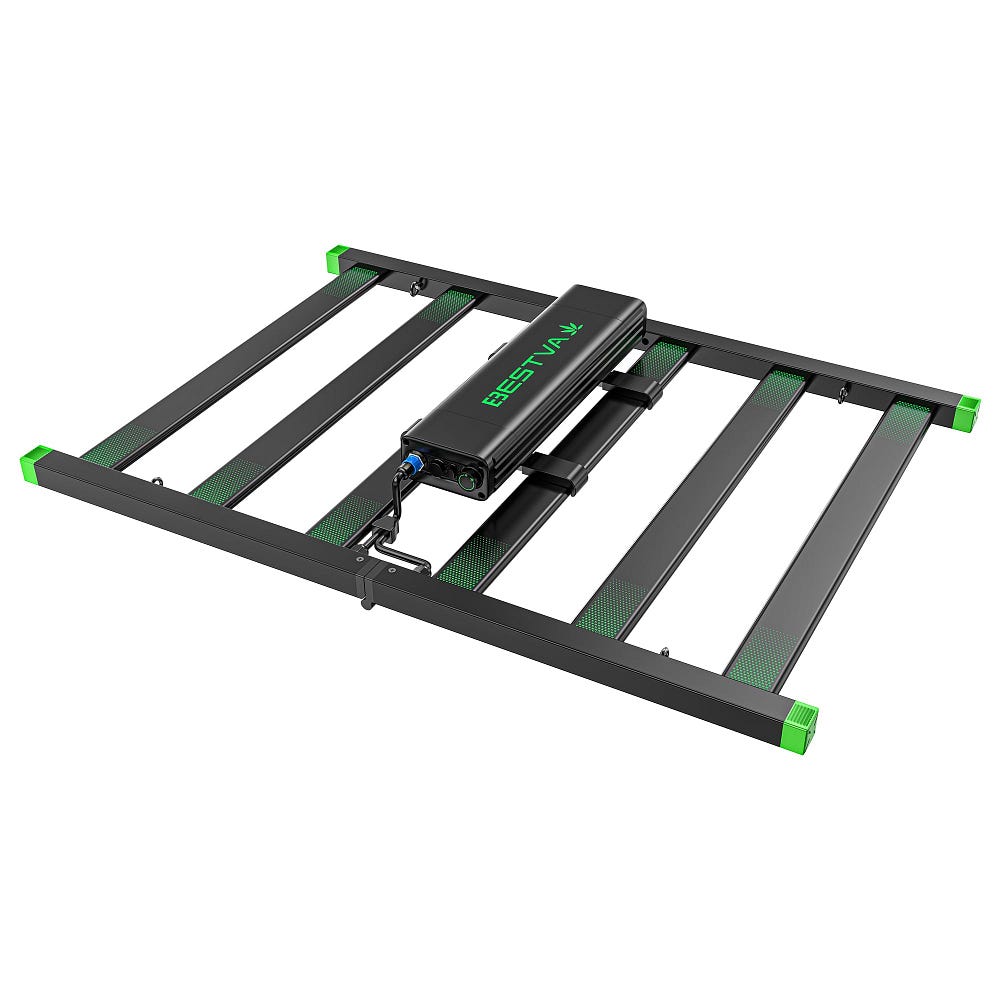
Features:
The BESTVA LED is the solution for indoor growing environments where ceiling height and distance from the tree canopy are critical. The BAT W400 is ideal for use in vertical racks, low rooms, benches and even tents. The grow light provides an efficient full spectrum and a healthy red-blue ratio to drive photo composition. Light energy between 500–599nm, previously thought to be wasted, penetrates deep into the plant canopy and promotes photomorphogenic responses. High colour rendering “white” light helps quickly identify potential threats to crops and provides superior working conditions and safety for workers. It is great for flowering and plant production.
Mammoth Lighting Fold Series MF04S LED Grow Light
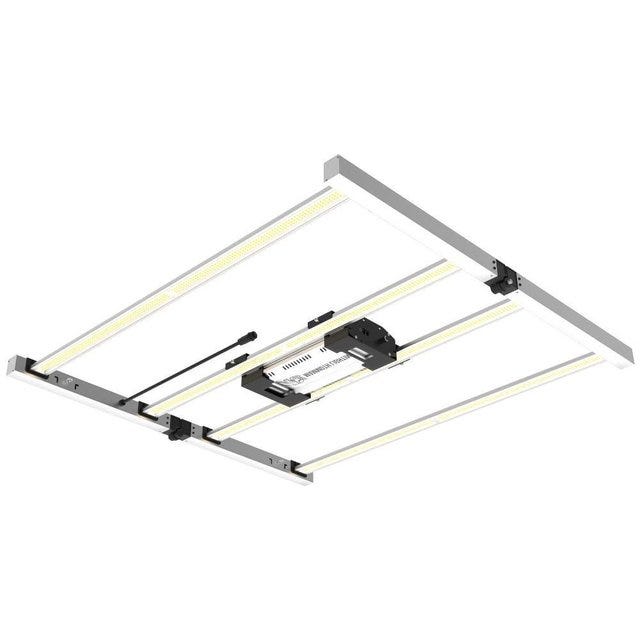
Features:
This Mammoth LED grow light draws 430 watts from the wall,achieving the high efficiency and higher average PPFD at 4'x4' flowering coverage,completely beat the 800w HPS/MH grow lamp. Simple structure,detachable driver,no fan,no noise. 4 aluminum light bars for better heat disappear and stay cool while enabling even light spread.Save you a lot at ventilation and exhaust. The most powerful daisy chain, controller available, especially beneficial for home,grow tent,grow room,greenhouse,garden,vertical Racks,hydroponic,soil growth. Proven high-yield full spectrum. Born for big buds,Rapid plant response from seed to flower,speeds up flowering time and boost yields.Easy dimming design meets needs of indoor plants at different stage of growth
LED Grow Light Buyer’s Guide
How to choose your grow light can be extremely confusing, even with all the information out there on the internet. A good LED Grow Light Buyer’s Guide will help you learn how to evaluate grow lights that may look great on paper, but fail to deliver where it really counts — in your plants! Below is some advice on how to know what a truly great LED grow light looks like, and why it’s not just important, but essential that you choose your grow light carefully.
Efficiency
There was a time when choosing a grow light was simple — all you needed to know was what brand and wattage you wanted. Things have changed. Drastically. The market has been flooded with grow light options and it can be quite challenging to figure out which light is best for you. Below is some advice on how to know what a truly great LED grow light looks like.
Micromole per Joule
The industry standard for measuring grow light efficiency is micromole per joule (sometimes written as umol/j, μmol/j, umolj-1 or PPF/W). That means that for every joule of electrical energy (joule = watt * second) a certain number of photon micromoles are produced. One micromole = 602,000,000,000,000,000. That’s a dizzyingly large amount of photons!
Highly efficient LED grow light range from 1.5 μmol/j and up (this number is constantly improving). Many of the most efficient LED grow lights are low power and, as a buyer, you may have to weigh out whether you are looking for efficiency or intensity, because at times one can be at the sacrifice of the other. Top brand HPS (high pressure sodium) lights are around 1.7 μmol/j. And while LED grow lights get more expensive than their HPS counterparts, they pay off in the long run with increased efficiency and much less heat output. Choosing an LED based grow light will save you money on both electricity bills and replacement bulbs.
Wall Plug Efficiency
LED grow lights are one of the most efficient types of grow lights available. They use about 50% of the electricity that HPS or MH lights use and produce more lumens per watt than fluorescent lighting. When you need a new light, think about whether you want an LED or not before making a purchase. It could save you money in the long run.
Another measurement relevant to DIY LED grow light enthusiasts is wall plug efficiency (WPE). This is a ratio of the amount of energy put in and the amount of light produced. This can be expressed as a percentage, such as 60% “wall plug efficiency,” which means that 60% of the electricity that goes through the light gets converted into light. The rest gets turned into heat that will need to be dealt with in the grow light itself as well as the room that houses the light.
It’s not typical to rate a grow light’s wall plug efficiency, but high-quality diodes made specifically for horticulture occasionally have this listed. For instance, high quality blue LEDs at 450nm can reach wall plug efficiencies of 60%, red LEDs at 660nm with 50% WPE, and green 530nm with 25% WPE. Wall plug efficiency can be calculated using a diode’s radiant flux (not luminous flux, which is a measure of how bright a light appears to the human eye and not how many photons it is producing) divided by the total wattage of electricity the diode uses. Remember to convert between milliwatt and watt, as necessary (1000 milliwatts = 1 watt).
Achieving High Efficiency
LED grow lights are the most efficient type of grow light on the market, which means that they use less electricity and last longer. But all LED grow lights are not created equal. Here is some advice for buying an LED grow light that achieves high efficiency.
Brands increase their efficiency by having high quality diodes, running them at low energy, having excellent heat management, and using a high percent of the most efficient diode wavelengths. While some LED companies market themselves as having many different color LEDs, this can often be at sacrificed efficiency, since each color of LED has a different efficiency at producing light. For instance, 450nm, 660nm, and high kelvin white (white LEDs are 450nm with a phosphor coating) are very efficient, while green LEDs are not very efficient.
Intensity
The intensity of the light is measured in watts per square foot. A good rule of thumb is that you want at least 100 watts per square foot if you are growing anything other than leafy greens. If the light doesn’t say the intensity, it’s a good idea to ask for a sample before purchase so you can test it out.
While there are no doubt that grow light spectrum is important, some studies suggest that even more important than spectrum is light intensity. There are a number of ways of measuring the intensity of a grow light — some good and others bad.
Conclusion
In the end, the best time to use grow lights is always in winter, giving you a head start on plants and crops that normally thrive in summer. Being able to sprout plants in a controlled way gives you a better chance of success than relying on unreliable winter weather.
For some plants that require a specific transition to daylight, grow lights are really the only option, as they can be programmed, or manually turned on and off, to provide 4, 6, 8, 12 or 16 hours of sunlight per day.
Best Fans For Grow Tents (Reviews)-2022 Updated
If you are new to growing plants indoors or are trying to grow plants without success, this article is for you. Proper air circulation in the indoor grow room is a critical part of the method. With poor circulation, your plants may be stunted, your shoots will be brittle and won’t be able to withstand heavy buds, and you may find yourself with mold or bug problems. All of these problems can be solved with a properly sized fan.
Use an indoor grow fan
Sometimes fans can even harm your indoor plants, so you’ll want to keep a few things in mind before turning them on. You have to set your fan strong enough to cause a slight rustling, but not too strong. If it’s too strong, your plant may overbend and find itself snapped or damaged. Additionally, it causes their substrates to dry out faster, stressing the plants and affecting their growth.
During bloom, if you set the fan too strong, you may find yourself damaging the plant’s blooms due to constant movement. This causes them to brush past each other; in turn, this can lead to a dramatic increase in the chances of fungal and bacterial infections.

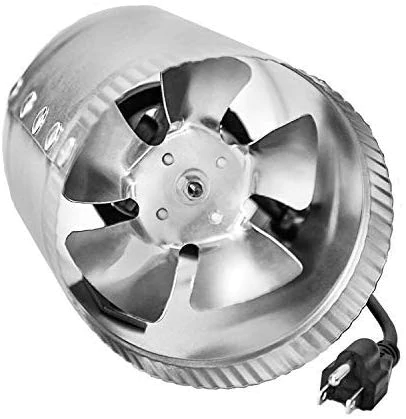
Features:
This ECO Farm inline duct fan is used in indoor grow facilities and vertical farms, heating and cooling transfer, commercial drying and air filtration applications. Inline blowers can also create a negative pressure environment, simulate wind, exhaust odors and fumes, and draw in fresh air from outside. The blower provides an airflow rate of 2120 CFM using 550 watts at maximum speed. The fans don’t “purge” at lower speeds or waste power. The fans give you unique control flexibility without background noise or hum at low speeds. Coated steel housing prevents rust and protects the motor and blade from accidental damage and harsh elements to reduce maintenance in demanding applications.
Features:
Controlled by a 32-bit microprocessor, these powerful mixed-flow digital fans deliver outstanding performance and value. Available in 4", 6", 8" and 10" models, Jetfans is the ideal solution for your ventilation needs. Because the motors in these fans are EC (electronically controlled), they offer very high efficiency, reliability and controllability. They include a highly precise speed control unit that can be detached from the fan and power cord if desired. Low power consumption — Jetfans run only 25% of the power of comparable inline fans Their EC motors are efficient, reliable and responsive to speed control ETL certified
iPower Booster Fan Inline Duct Vent Blower
Features:
Portable and lightweight, this iPower in-line duct fan can be installed anywhere because it features an extra-long 5.5' grounded power cord inside. The maximum ambient temperature is 60°C / 140°F. The advantages of fans are that they can deliver large amounts of air quickly and efficiently; temperature control — cooling chambers that tend to accumulate excess heat. If any other substances/particles get into the ducted fan and jam the blades, the user should immediately turn off the power, clean it up, and turn the power back on after proper disposal.
Grow Tent Fan Buying Guide
If you are not completely sure what type of fan you need and what features are important, this buying guide will clear some things up. We’ll begin with a rundown of the different types of fans.
Different Types of Fans
There are 3 basic types of fans typically used for gardening applications:
Inline fans
Oscillating fans
Static fans
Each type of fan is used for a specific purpose. Most serious growers will need all 3 types for a successful operation.
In addition to having humidity control and temperature control via a central A/C unit or a window mount or portable unit, having airflow is necessary for reasons discussed earlier.
It is not enough to just control temperature and humidity. And each type of fan will aid you in a different way.
Inline Fans
These are fans that are typically installed within a duct system or used as exhaust fans blowing directly outside. They are not always equipped with sensors or on/off switches but many of the higher end models are.
They are called inline, because they are used in line with the ducts, as an integral part of the ventilation system, as opposed to a free standing fan that blows air all around the room.
A serious grow tent will need at least 2 inline fans, one for intake and one for exhaust. Some larger operations will have several inline fans to do the job. Smaller tents usually just have an exhaust fan.
Oscillating Fans
Oscillators are fans that serve to move air around inside the tent, or room. Where inline fans are used in a closed system to bring in air from outside or push air from inside to the outside, oscillating fans keep the internal air from getting stale.
They also serve the important role of agitating your plants, serving as artificial wind inside your closed system. Plants need to be moved around by natural forces to help them stay healthy, and since you have no wind inside, the oscillating fans are taking the place of natural wind.
This type of fan is also good for keeping the temperature even throughout a large area. In any room, especially one with grow lights and other heat sources, hot spots will quickly emerge.
Near the lights it may be several degrees hotter than elsewhere in the tent. Moving the air from one place to another will keep ambient temperatures more uniform in your space. The moving air also serves to dry the plants, which prevents mold from forming.
Static Fans
These are the basic fans you see everywhere. They do not oscillate or move. They can either sit on the floor or be clipped on to structures, but static fans are stationary.
Static fans are used in situations where you need to constantly move air in a specific area of the room, and you want the airflow to stay on the same spot over time.
A great example of when you need a static fan would be if you had a section where several lights were in one spot. A static fan could cool the surface temp of the lights as well as drop the temp in the immediate area, before the oscillating fans move the air out of the area.
Fan Size
The bigger the fan the more air it will move. This is a simple concept which makes it easy to choose your fan size.
Of course, that is not always the only concern, considering many of us are working within finite space constraints. If you had a massive warehouse, you would simply buy as many of the biggest fans as you could afford and move as much air as possible.
Inline
Inline fans come in many sizes. The most common sizes you will see in grow tents are 4″ and 6″, with the occasional 8 or 12″ fan. They do get even bigger but once you get over 8″, you are getting into some heavy duty large spaces, not the normal grow tent situation.
Oscillating
Oscillating fans come in many sizes as well, but most situations require a 12″ fan or larger, which are the most common sizes. Chances are good that if you have a normal grow tent you will be looking for a small oscillating fan for grow tent use of around 12 inches in size. These can move a lot of air and do not take up too much space.
Static
Static fans can be found in the same sizes as oscillating fans. Most common for our application are the clip on 8″ or standard floor fans. Most box fans that sit on the floor are about 20″. You can choose the size you need based on your specific situation.
Budget
Because fans are so important, it makes sense to buy the best ones you can with the money you have. Since they are generally not that expensive you can get a significantly better fan for only a few dollars more in most cases.
You want a fan that will last a long time and move a lot of air. You usually want it to do so with a minimum amount of noise, too.
There are many poorly made fans you can get for extremely cheap, so be careful! If you stick to the fans we have highlighted here, you will be sure to get a quality unit at a fair price.
Conclusion
Inline fans are a great way to improve air circulation in your grow room and avoid problems like mold growth, hot spots, and pest infestations. If you want to improve air circulation in your grow room, an inline fan is a good choice.
Best Dehumidifiers for Indoor Grow Tent of 2022
Have you ever wondered how to solve problems like condensation, mold and humid indoor air? The best dehumidifiers can help with all of these common problems, removing moisture from the air before it develops into further problems like mold. We’ve tested and compared the best dehumidifiers you can buy right now and rounded up our favorites.
A dehumidifier can control the humidity in your home and reduce signs of dampness, such as mold and condensation, by drawing in moist air and circulating cool, dry air into your home. How they do this depends on the type of dehumidifier you choose. Refrigerator dehumidifiers work similarly to the best air purifiers. A fan takes air to the dehumidifier and circulates it, passing the humidified air through a coolant-cooled coil. This causes airborne moisture to condense on them, which can be collected or expelled. The air is heated and circulated back into the room.
What are tent dehumidifiers for growing plants?
A dehumidifier is a device that passes air masses through itself and extracts moisture from them. When growing houseplants, vegetables, greens, herbs, it is important to maintain the right balance of humidity in the air. For most crops, this is 50 to 70% (limit is 80%). But in conditions of a plant tent humidity will always tend to rise up to 90%. After all, water evaporates directly from the soil (nutrient mixture), due to constant transpiration (evaporation from external “organs” of a plant) gets into the environment. And if humidity level rises above 70–80%, it can already lead to the development of various diseases in crops grown (for example, tomatoes often develop a “black rot“). And also in areas of rotten is formed a favorable environment for the development of mold, lichens. And if it is not controlled, you can literally lose the entire crop in a few days.
Installation of dehumidifier for grow tent — prevents all negative effects of high humidity. And creating a favorable environment for plants accelerates plant growth, increases yields, and levels out the possible development of fungal infections.
ECO Farm Mini small 500ml portable air conditioner dehumidifier
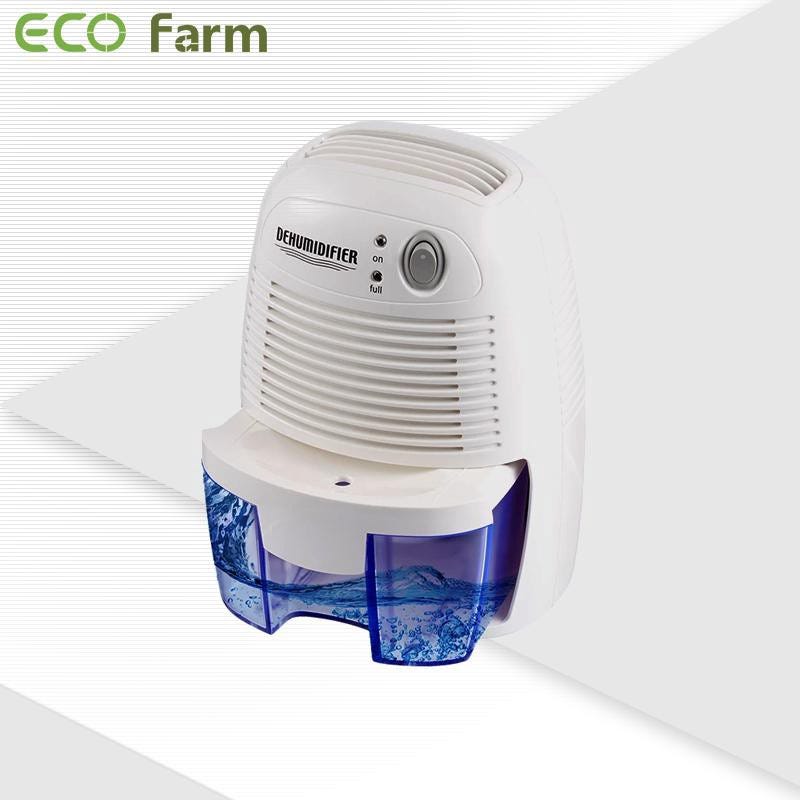
Features:
The ECO Farm Dehumidifier is one of the most popular options that you can considerably get your hands on. This is suitable for a small dehumidifier for grow tents. It is also a highly recommended grow tent dehumidifier due to its efficient performance, sleek design, and portability. Like most mini dehumidifiers it works best between 59–86F, the top end is just about right for a grow tent. It’s a reliable machine which can run continuously with no problem and comes with a 12-month warranty. Despite the 500 ml capacity, this dehumidifier is extremely lightweight, which is comparatively a lot lesser as opposed to the other options. This enables you to create an environment with optimal moisture settings.
VIVOSUN Small Space Mini Dehumidifier for Grow Tent Closets
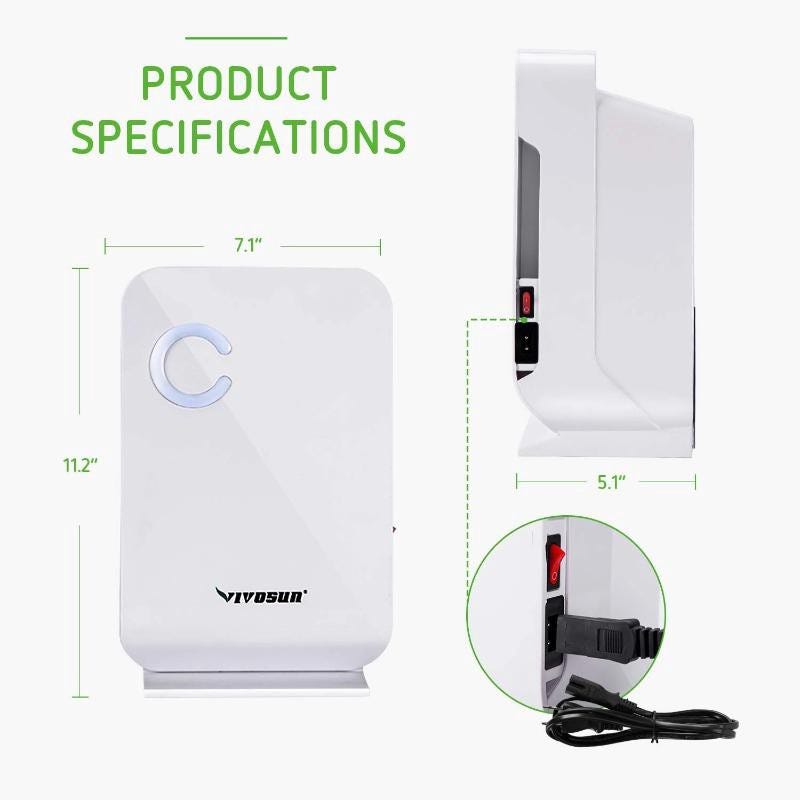
Features:
This grow tent dehumidifier can cover an area of 269Ft, which is pretty awesome for a smaller device. You can also use it at other places in your house, For instance, in the bathrooms and basements that attract the most moisture. The compact and portable design of this mini dehumidifier is what makes it a superlative purchase, especially if you are short on a budget. This is one of the few options in the market that come with external handles that make it easier for you to move around. As for the capacity, despite being a mini version, it comes with a 2200 ml capacity and the tank easily slides out to enable easier cleaning results.
Eva-dry Edv-1100 Electric Petite Dehumidifier
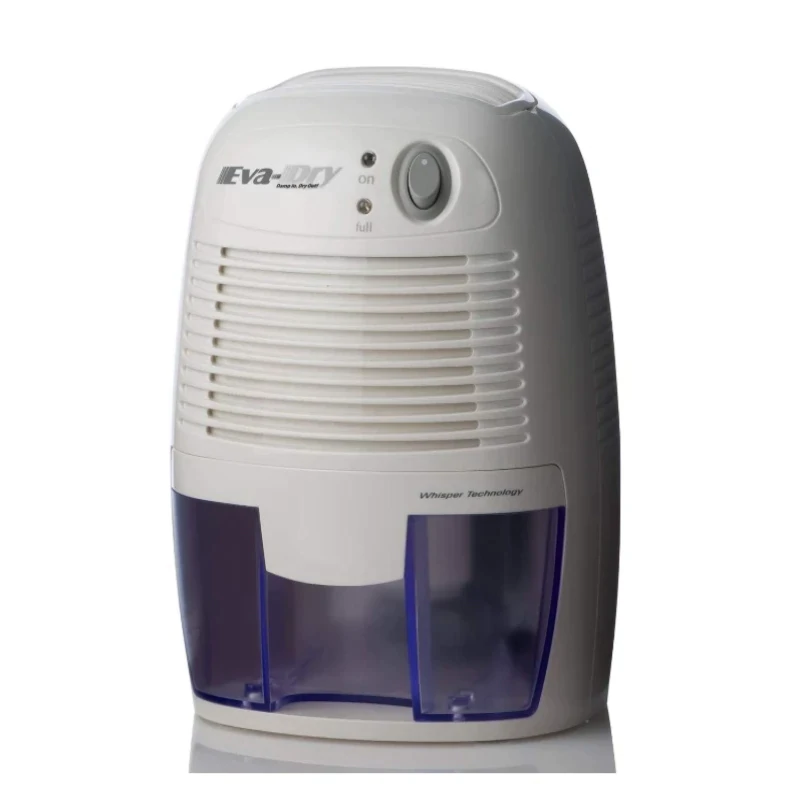
Features:
The EDV-1100 is a small electric dehumidifier with Peltier technology that runs on just 22.5 watts and is very quiet, making it ideal for nurseries, home offices, laundry rooms, boats, RVs and bedrooms. This portable dehumidifier should be used as a 1 room dehumidifier for maximum effect. The unit can work in house areas up to 1,100 cubic feet. It absorbs up to 8 ounces of water per day at 86° F and 80% R.H and has a 16-ounce removable reservoir with full indicator lights and auto shut-off.
Choosing the best dehumidifier features
When choosing a dehumidifier for your grow tent, there’s a few things to keep in mind.
Dehumidifiers are rated by how many pints of water they are able to remove from the air. If much of that space is filled with transpiring leaves, it can get humid quickly. Plants will transpire nearly all of the water you add each day.
Small dehumidifiers have tiny reservoirs, so you may find yourself having to empty them often or they’ll shut off. Emptying buckets sucks. Larger models with bigger reservoirs reduce the chance it will shut off inadvertently.
Look for models that allow you to attach drainage hoses to reduce this hassle.
A dehumidifier with a pump will let you reach elevated drains.
One of the best dehumidifier options for grow tent usage is bluetooth connectivity so you can monitor and track levels on your phone.
Look for models with multiple fan speeds and settings for target humidity level. Some cheaper models are designed to run continuously until full, while others can shut off when they reach a set level.
Conclusion
Well, it looks like you’re interested in the best dehumidifiers for grow tents! Different types of dehumidifiers, ideal for growing plants and flowers indoors. By choosing the right one for your needs, you can prevent any moisture-related issues that may arise during plant transport and growth.
Black Box 4ft x 4ft x 6.5ft Grow Tent For Growing Plants Indoors VS Finnhomy 600D Mylar Hydroponic Grow Tent
Grow tents are collapsible tents with reflective interior walls for growing plants indoors. They may vary in size, but most will fit in your average wardrobe.
If you’re a new cardholder just starting to grow medical plants indoors, this best grow tent guide is for you. We’ve put together our grow tent guide to help beginners with everything they need to set up a grow tent at home. When starting out, it’s important to get a properly sized grow tent with proper lighting and ventilation. This grow tent guide will make sure you start your planting journey on the right track.
The benefits of using a grow tent
Grow tents ensure you have privacy while growing plants. Your plants are not exposed, but hidden in the tent.
Grow tents protect your plants from insects, pests and pets and ensure they are not damaged as they grow
Grow tents ensure optimal lighting as the light from the grow lights bounces off the plants through reflective walls — ensuring good lighting and proper growth from all angles
Grow tents also help isolate the environment and create a controlled space for normal plant growth, as well as a place where they can grow undisturbed
Black Box 4ft x 4ft x 6.5ft Grow Tent For Growing Plants Indoors
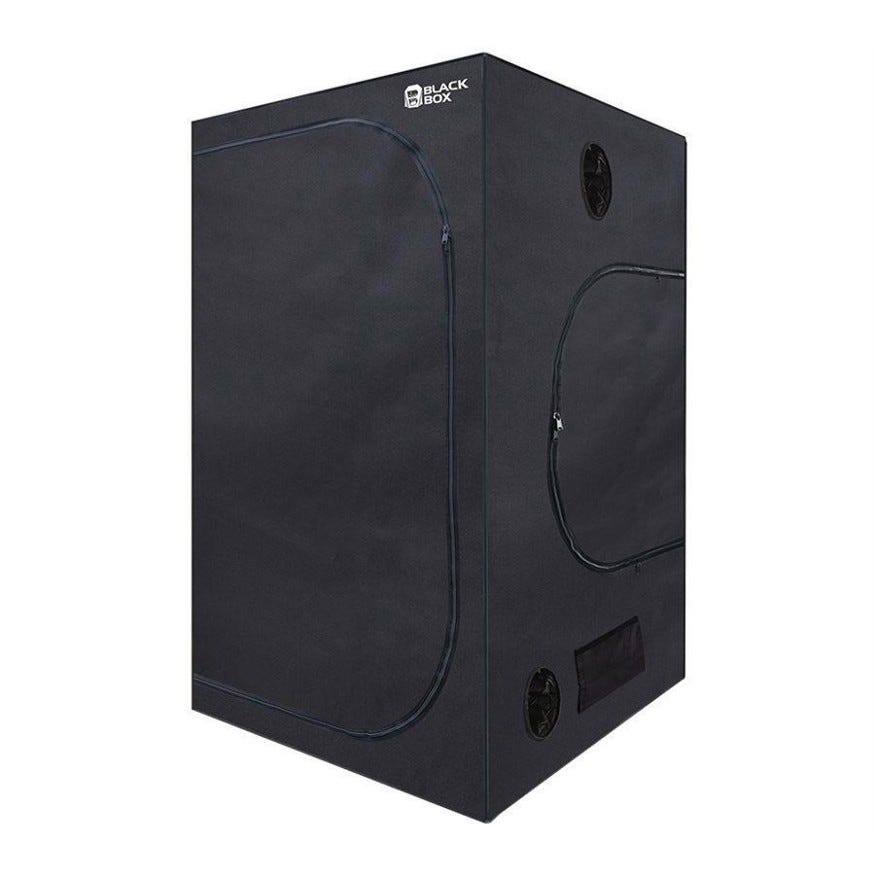
Features:
The Black Box Grow Tent is a sealed indoor growing space for starting new plants from seeds or cuttings without the need for an exterior greenhouse. The exterior is made from a thick black canvas and has a silver reflective interior coating which lets the light provided from your grow lights stay concentrated on the plants indoors. It can withstand harsh conditions and ensure that the light stays in the tent. The Black Box also features metal framing made of strong, durable, steel tubing and heavy-duty zippers. The zippers of the tent are very durable and will not get stuck even after months of use. With a removable divider wall in the middle, the Black Box enables you to manipulate the growing environment so that you can achieve the optimum climate for your plants’ better growth.
Finnhomy 600D Mylar Hydroponic Grow Tent
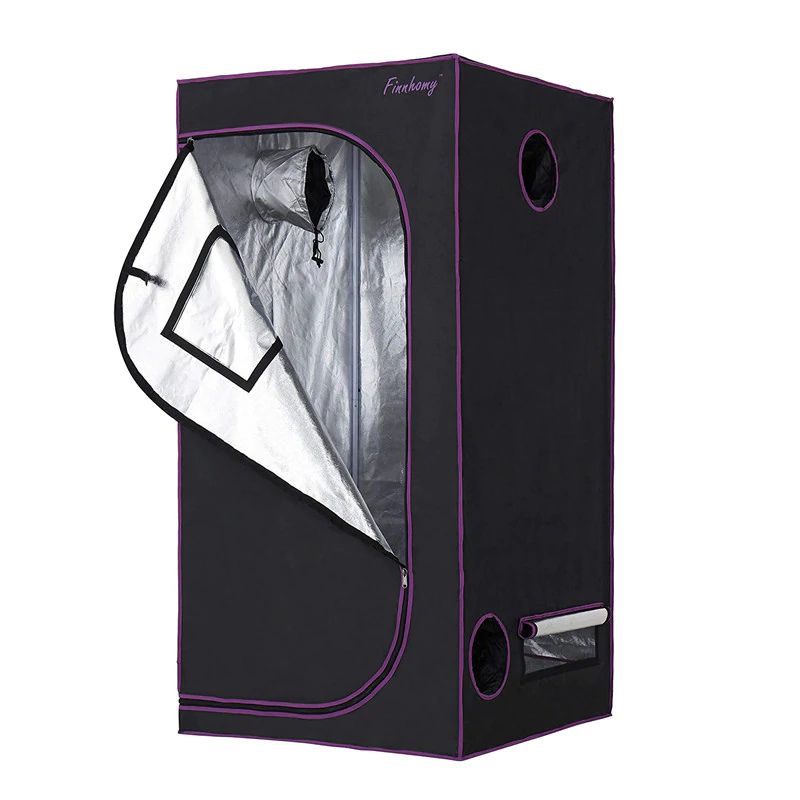
Features:
This grow tent is made of 600D oxford, which is ripstop, and the double seam process ensures durable and long-lasting use. The high quality tent material is reinforced with thick metal poles that can hold up to 150 lbs and keep plants growing well. Over 95% reflective Mylar interior returns up to 92–97% of the grow bulb’s light back to your plants and herbs. Removable Mylar floor tray enhances 100% reflection. The system contains several pipe ports with pull cords. There are also multiple rectangular mesh ventilation windows with integrated flaps to control the flow of light in and out. It use SBS zippers to ensure the door opens smoothly and the viewing window makes it easy to peek at your plants.
Factors to Consider When You’re Shopping for a Grow Tent
Now that you know some of the benefits that are associated with using a grow tent to cultivate plants indoors, if you’ve decided that yes, you would like to use one, let’s take a look at some of the key factors that you should take into consider when you’re shopping.
The construction. The construction of the grow tent is crucial. This includes both the fabric that the tent itself is made of, as well as the bars that support the tent. The best grow tents feature durable canvas exterior and are lined with reflective material on the interior, and the seams are double stitched. The poles are made of lightweight, yet heavy-duty, rustproof metals, such as aluminum.
The features. You’ll want to consider the features that the tent offers, too. The best grow tents will feature circular shaped holes that can accommodate ventilation and electrical systems, and they may feature hooks on the ceiling that grow lights can be suspended from, too. They will also feature double-zipped doors and access windows, and durable, removable floors.
Ease of use. You don’t want the set-up to be complicated. Thoughtfully designed grow tents are super easy set up with tool-free assembly and disassembly.
The price. Last but certainly not least, you’ll also want to consider the cost of the tent. The prices of grow tents vary widely. To avoid spending more than you can comfortably afford, set a budget before you start shopping is highly recommended.
Conclusion
Many home growers use grow tents for indoor plants setups because they are affordable, convenient, and easy to set up. You can join them. Just follow this guide to choose and set up your indoor grow tent, and you’ll soon be rolling joints full of your own plants year-round.